Let’s make some stuff!


Something you may want to consider before investing time and money on making board games out of wood is to first construct the game of your choice using foam poster board. It will only take a few hours of work and a few dollars worth of material to make an attractive game. The whole family can join in the project, too!
If you enjoy playing the game and want a nicer board, then consider making one out of hardwood. The instructions will hopefully be easy to follow. Seasoned woodworkers will be able to finish a wooden board in just a few days, including drying time for the finish. Beginners may move at a slower pace but will pick up some new skills along the way. The four games listed here have instructions for making game boards out of either foam poster board or wood. They are: Orbital Summation, Rainbow Raceway, Octosory, and Aggarv8ion.
These four games, as well as DynoDiscs and Game Pieces, all have their own separate page with instructions for making that item. Here’s how to find those pages:
Scroll down this page (GarsGarage) past the first topic Suggested Tools, then look for the link included in each item’s description. Also, on each game’s page that is accessed from the Main Menu , there is a link to take you directly to the same instruction page.
At the beginning of the instructions for making Rainbow Raceway I have written a little history of CAD/CAM machining as it applied to toolmakers in my shop. Hopefully some people may find it interesting.
Suggested Tools
The following mini-section is included on every page that shows how to make board games. It displays the tools needed to pierce foam poster board.
Useful tools for piercing foam poster board.
Click the pictures for a bigger view.
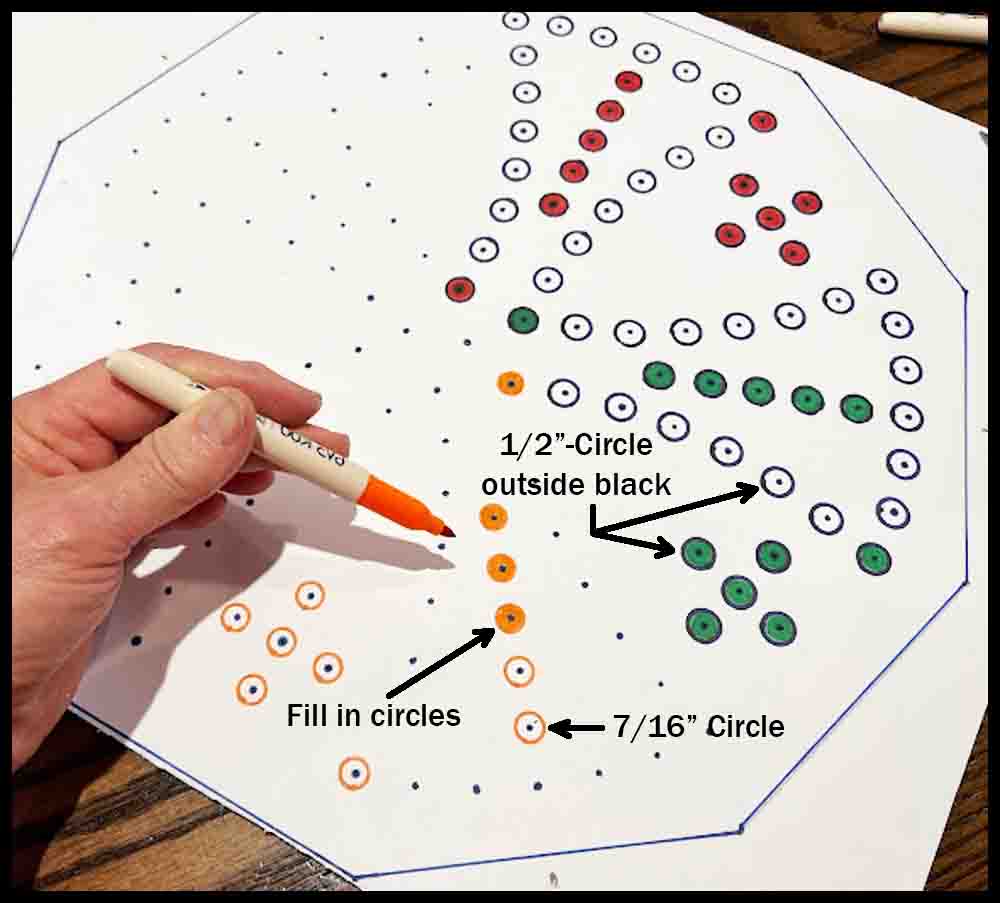
A. The first tool in the top picture is a push pin. It works great for piercing the initial holes through templates made out of cardstock used for making Octosory and Aggarv8ion. For Rainbow Raceway and Orbital Summation, push pins are used for the initial mark in the image of the game that was printed out.
B. The metal scribe shown below the pushpin is a great choice to use as a center punch on wooden bases that have been pre-marked with a push pin. The enlarged view of the tip is just to show this particular tool. The important part is the nice sharp point.
C. The third tool from the top is a homemade scribe I have used for years. This is the perfect size (1/8″ diameter) for opening up the small holes initially made in all of the foam boards. The sharp point assures the hole location is picked up accurately. Search for a similar pointed awl or scribe in a hardware store or use a screwdriver like the small one described below in D.
D. The Phillips screwdrivers offer three different sizes for piercing clearance holes. The small one (.120 dia.) can be used the same way as the homemade scribe above. The point is small enough to pick up the initial small holes made in the poster board, although it might be helpful to grind more of a point on it with a belt sander.
E. Two games will use a slightly smaller diameter piercing tool. Orbital Summation and the smaller version of Rainbow Raceway use #6-32 screws to make the game pieces. The tools shown in the lower picture were both made from drill bits found around the garage. The shorter drill uses a wire nut for a handle. On the longer carbide drill I found a plastic drywall insert to use as a handle. Both handles are taped on with duct tape.


Typical Power Tools
If you are interested in making your own games or DynoDiscs, having access to certain tools can make the job much easier. While you will only need some scissors for the cardboard DynoDisc shown on this website, other tools may prove to be essential for woodworking.
Here is a list of power tools that any beginner should own or have on their wish list:
1. Electric hand drill and drill bits. FYI, toolmakers call these drill motors and drills. Common twist drills are broken down into different sizes: Fraction, Letter, and Number. Fraction drills are the most common and usually start at 1/64″ on up to 17/32″ in increments of 1/64″. (There are bigger sizes used in toolrooms). Letter drills have alphabet letters on each drill that correspond to different diameters, and Number drills are smaller drills with diameters assigned to specific numbers. They allow for a wider selection of small sizes, and are commonly used for pilot holes when tapping threads in small holes.


The drill set on the left is rather expensive, but includes Fraction, Letter, and Number drills. They usually go up to 1/2″ or 17/32″ in diameter and are made out of High Speed Steel. Some are advertised as titanium coated. I am not sure how much tougher that makes them. Other useful drills are carbide tipped. They will drill through concrete and work best with a hammer drill.
The blade drills on the left are very common as well as extremely useful for certain jobs. They are what I used when counterboring holes for game pieces in my board games. The edges are easily modified with a belt sander or bench grinder.


2. Drill press This tool is very helpful in accurately drilling holes in gameboards. You will always have straight holes and you can set the depth of your holes accurately, something that is very difficult with a hand drill. You can buy a free-standing model as shown above or a table top model. If you have the room, buy the biggest one in terms of “swing” you can afford (within reason). Mine has a 14″ swing, which means you can drill half that distance from the edge of a workpiece. I still have to hand drill the center of my bigger gameboards because I can only reach 7″ into the board on my drill press. But it works fine for most applications.
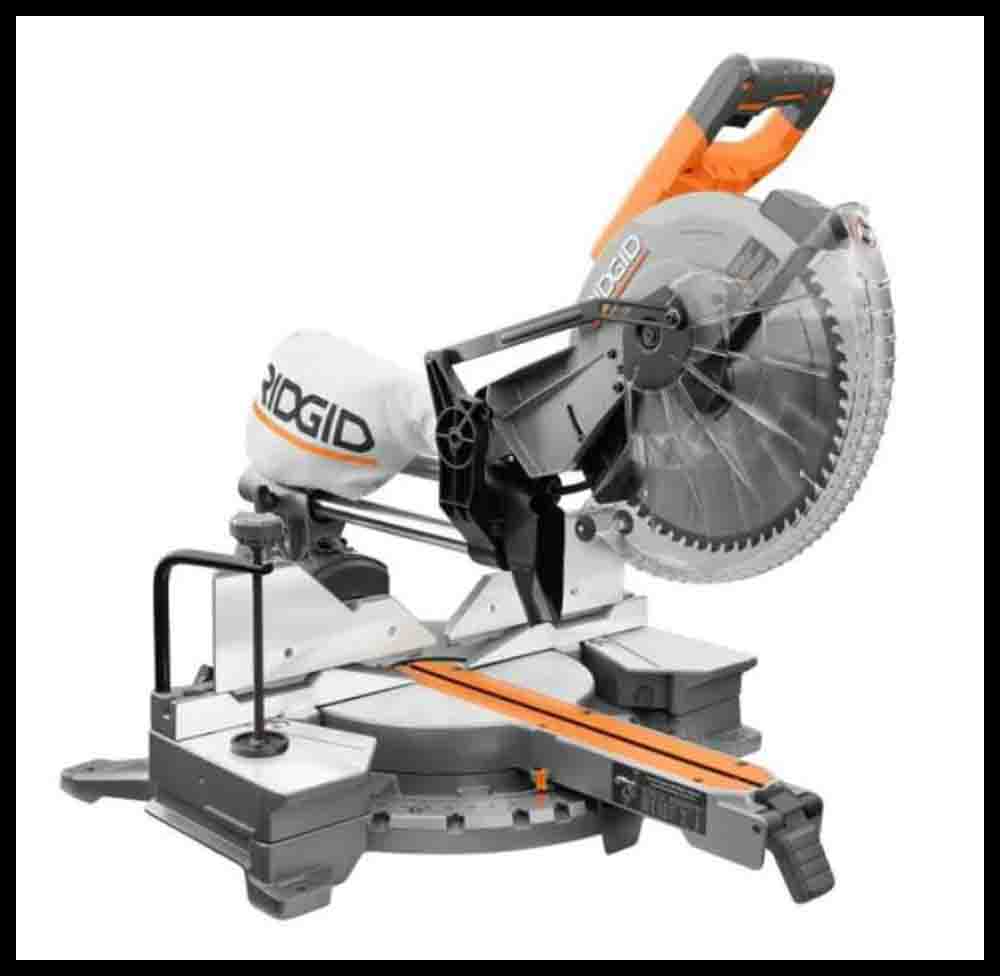
3. 12″ miter saw with a sliding compound. I would have not made any of my wooden game boards without owning this tool. Once you practice and learn how to use it, it will not only accurately cut pieces square or at a certain angle, you can also use it to custom shave tiny increments from materials or add bevel angles (tilt the head). I suggest buying a stand, too, to make many jobs easier. (unless the saw will be moved to different locations often).
4. Belt Sander. A typical belt sander may be purchased for under $200 dollars that has a 4″ x 36″ belt. Once you own a belt sander, you will never do without one. ’nuff said!
5. Jig Saw and/or Scroll Saw. Miter saws are great for making straight cuts, but often cutting shapes with a hand saw is difficult. That’s where a Jig Saw comes in handy.
6. Router. A router and a set of cutting tools will add a finishing touch to woodworking projects. They are easy to use and not very expensive. (for entry level and occasional use)
7. Shop Vac. (duh!)
8. Air Compressor. Besides occasionally adding air to our cars, I use several pneumatic tools when working on objects in the garage. The small disc grinder that uses 3″ sandpaper discs probably gets used the most. Also, after sanding game boards, the dust needs to be blown off the surface and inside holes. An air nozzle will do the job. The only potential problem with using an air compressor for this is that sometimes water condenses in the tank and some extra moisture will get in the airline. So usually I pick up my leaf blower and blow all the dust away.
9. Portable Light. This is a no brainer, but an extra light focused on my work has saved me from making mistakes many times. It is part of a safe working environment.


Warning! If you are new to using power tools, have a knowledgeable person teach you the basics and then practice a lot before attempting to make anything. Wear safety glasses any time you are using power tools! I know from experience how dangerous these tools can be. I have the scars to prove it!
Specialized Tools
I am sure that experienced woodworkers already know how to equip a shop. In fact, since my background is mostly working with industrial metalworking machinery, there are probably many tools out there that I either do not know about or have never used. Some examples include a planer and benchtop jointer. I know what they do but have never used one.
If you want to make game pieces or precise spindles, then you may want to consider adding a small lathe to your shop. This is for the very serious hobbyist and takes a lot of instruction and practice. You can lose a finger or worse if you are not careful! But, in my opinion, it is one of the most useful and FUN machines to own! You will also need essential accessories to go along with it, such as a live center, drill chuck, collet chucks, tool bits (and a grinder to shape them), etc. Some pictures showing lathe work are included in the section on making DynoDiscs.
Finally, a really nice shop will possibly include a CNC Milling Machine along with a 3D printer. This will make a lathe an optional tool and will also produce very professional results. As I mentioned elsewhere, these tools are on my bucket list. I have extensive experience with industrial CNC Milling Machines but have never had the opportunity to play with a 3D printer, home CNC Mill, or laser.
I really cannot display a complete list of tools essential for making games and toys. As a person progresses in their skills, they will learn different methods for performing work and possibly acquire the tools that will make these tasks easier.
Below I have posted 5 pictures of my “shop” which is really the end of my garage. As you can see, it is a mess. I will clean it up periodically, but the truth is, this is usually how it looks! I get very focused on a job and don’t want to fool around with cleaning up. Not the best practice! I am constantly misplacing items.


Ready to start making stuff? I have started with a favorite toy of mine, DynoDiscs. Enjoy!
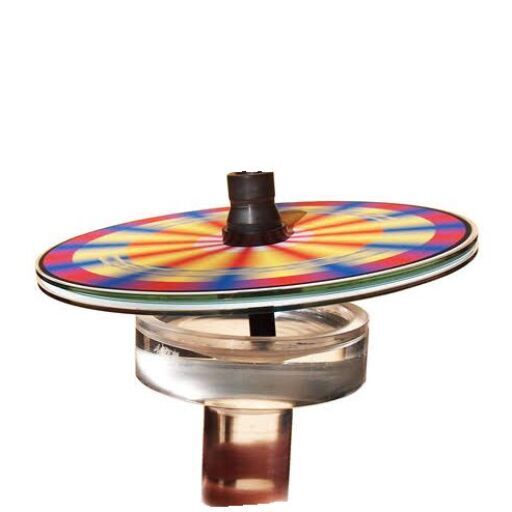
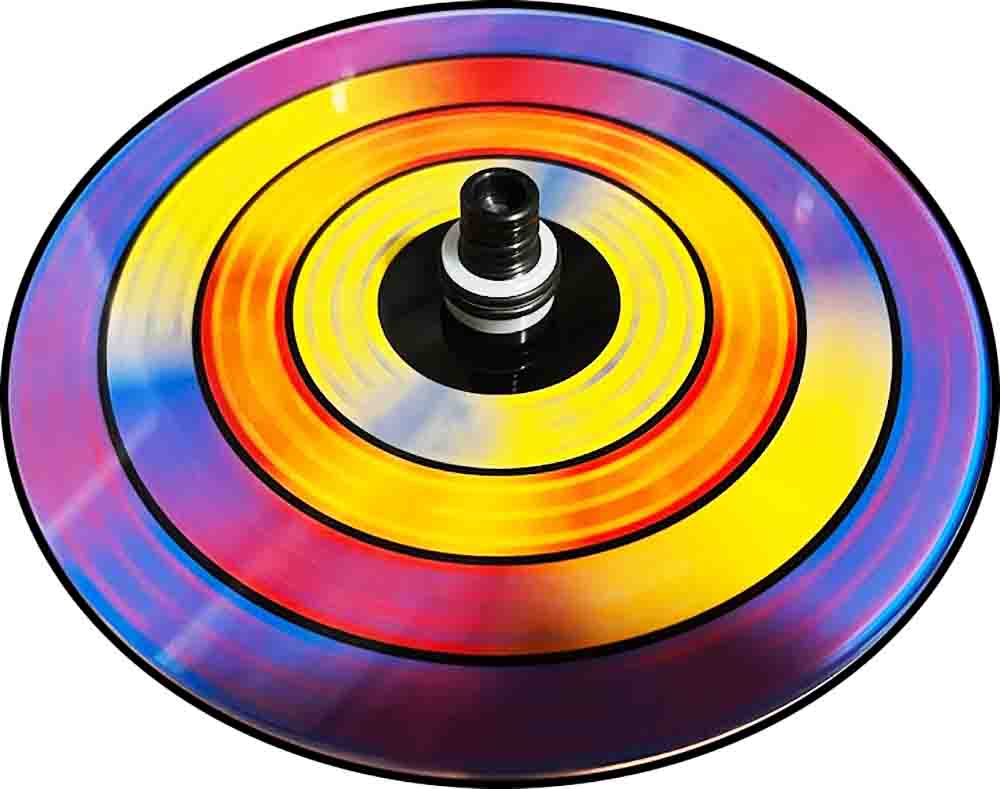
Make your own DynoDiscs
These instructions will show you how to make a simple DynoDisc out of wood or plastic with a metal spindle. It is a good introduction to the basic concepts involved in making and spinning DynoDiscs.
Orbital Summation Board Game

Click the green button for instructions on building an easy-to-make version of Orbital Summation with a foam board.
For a nicer game, choose the version that uses a wooden board for the base.
Rainbow Raceway Board Game

Make a foam poster board version of Rainbow Raceway in a few hours or less.
Or, if you feel you are up to the task, make one with a wooden base!
At the beginning of the instructions for making a Rainbow Raceway game, there is a little section explaining what CAD/CAM is and how it makes manufacturing easier. This section may be skipped over.
Click the blue button for instructions
Octosory Board Game
Octosory, like Aggarv8ion, is a variation of an old game that has been around for a long time. Both are excellent Board Games for playing around the kitchen table.


I have made two versions of Octosory in wood, one smaller than the other. The bigger version uses marbles for game pieces, while the smaller version uses “missiles” that were custom made on a lathe. Both versions are displayed in the pictures above.
If you are interested in playing Octosory, I suggest making a simple version out of foam poster board first. It requires a minimal amount of skill to construct, but will still be totally functional and look nice. If you are a woodworker and decide an Octosory game made out of oak or other wood will be something you want to build, I have included complete instructions on the Make Your Own Octosory Game page.
Aggarv8ion Board Game

Either Aggarv8ion or Octosory is a good choice for making your first board game out of wood. The game of Aggravation has been around for many years and is probably the most common board game made out of wood. People make their own or purchase them from different manufacturers.
If you just want to play the game and not mess around making a wooden board at this time, I have included instructions for building an attractive game using foam poster board.
The same techniques used in making an Octosory Board Game will apply here. Press the Purple button to get more info on making your own game.
Game Pieces
If you build the gameboards, you have to have some game pieces to play them with! Click the red button for instructions on making some out of stainless screws, nuts, and washers.


Anne’s Angel
T1