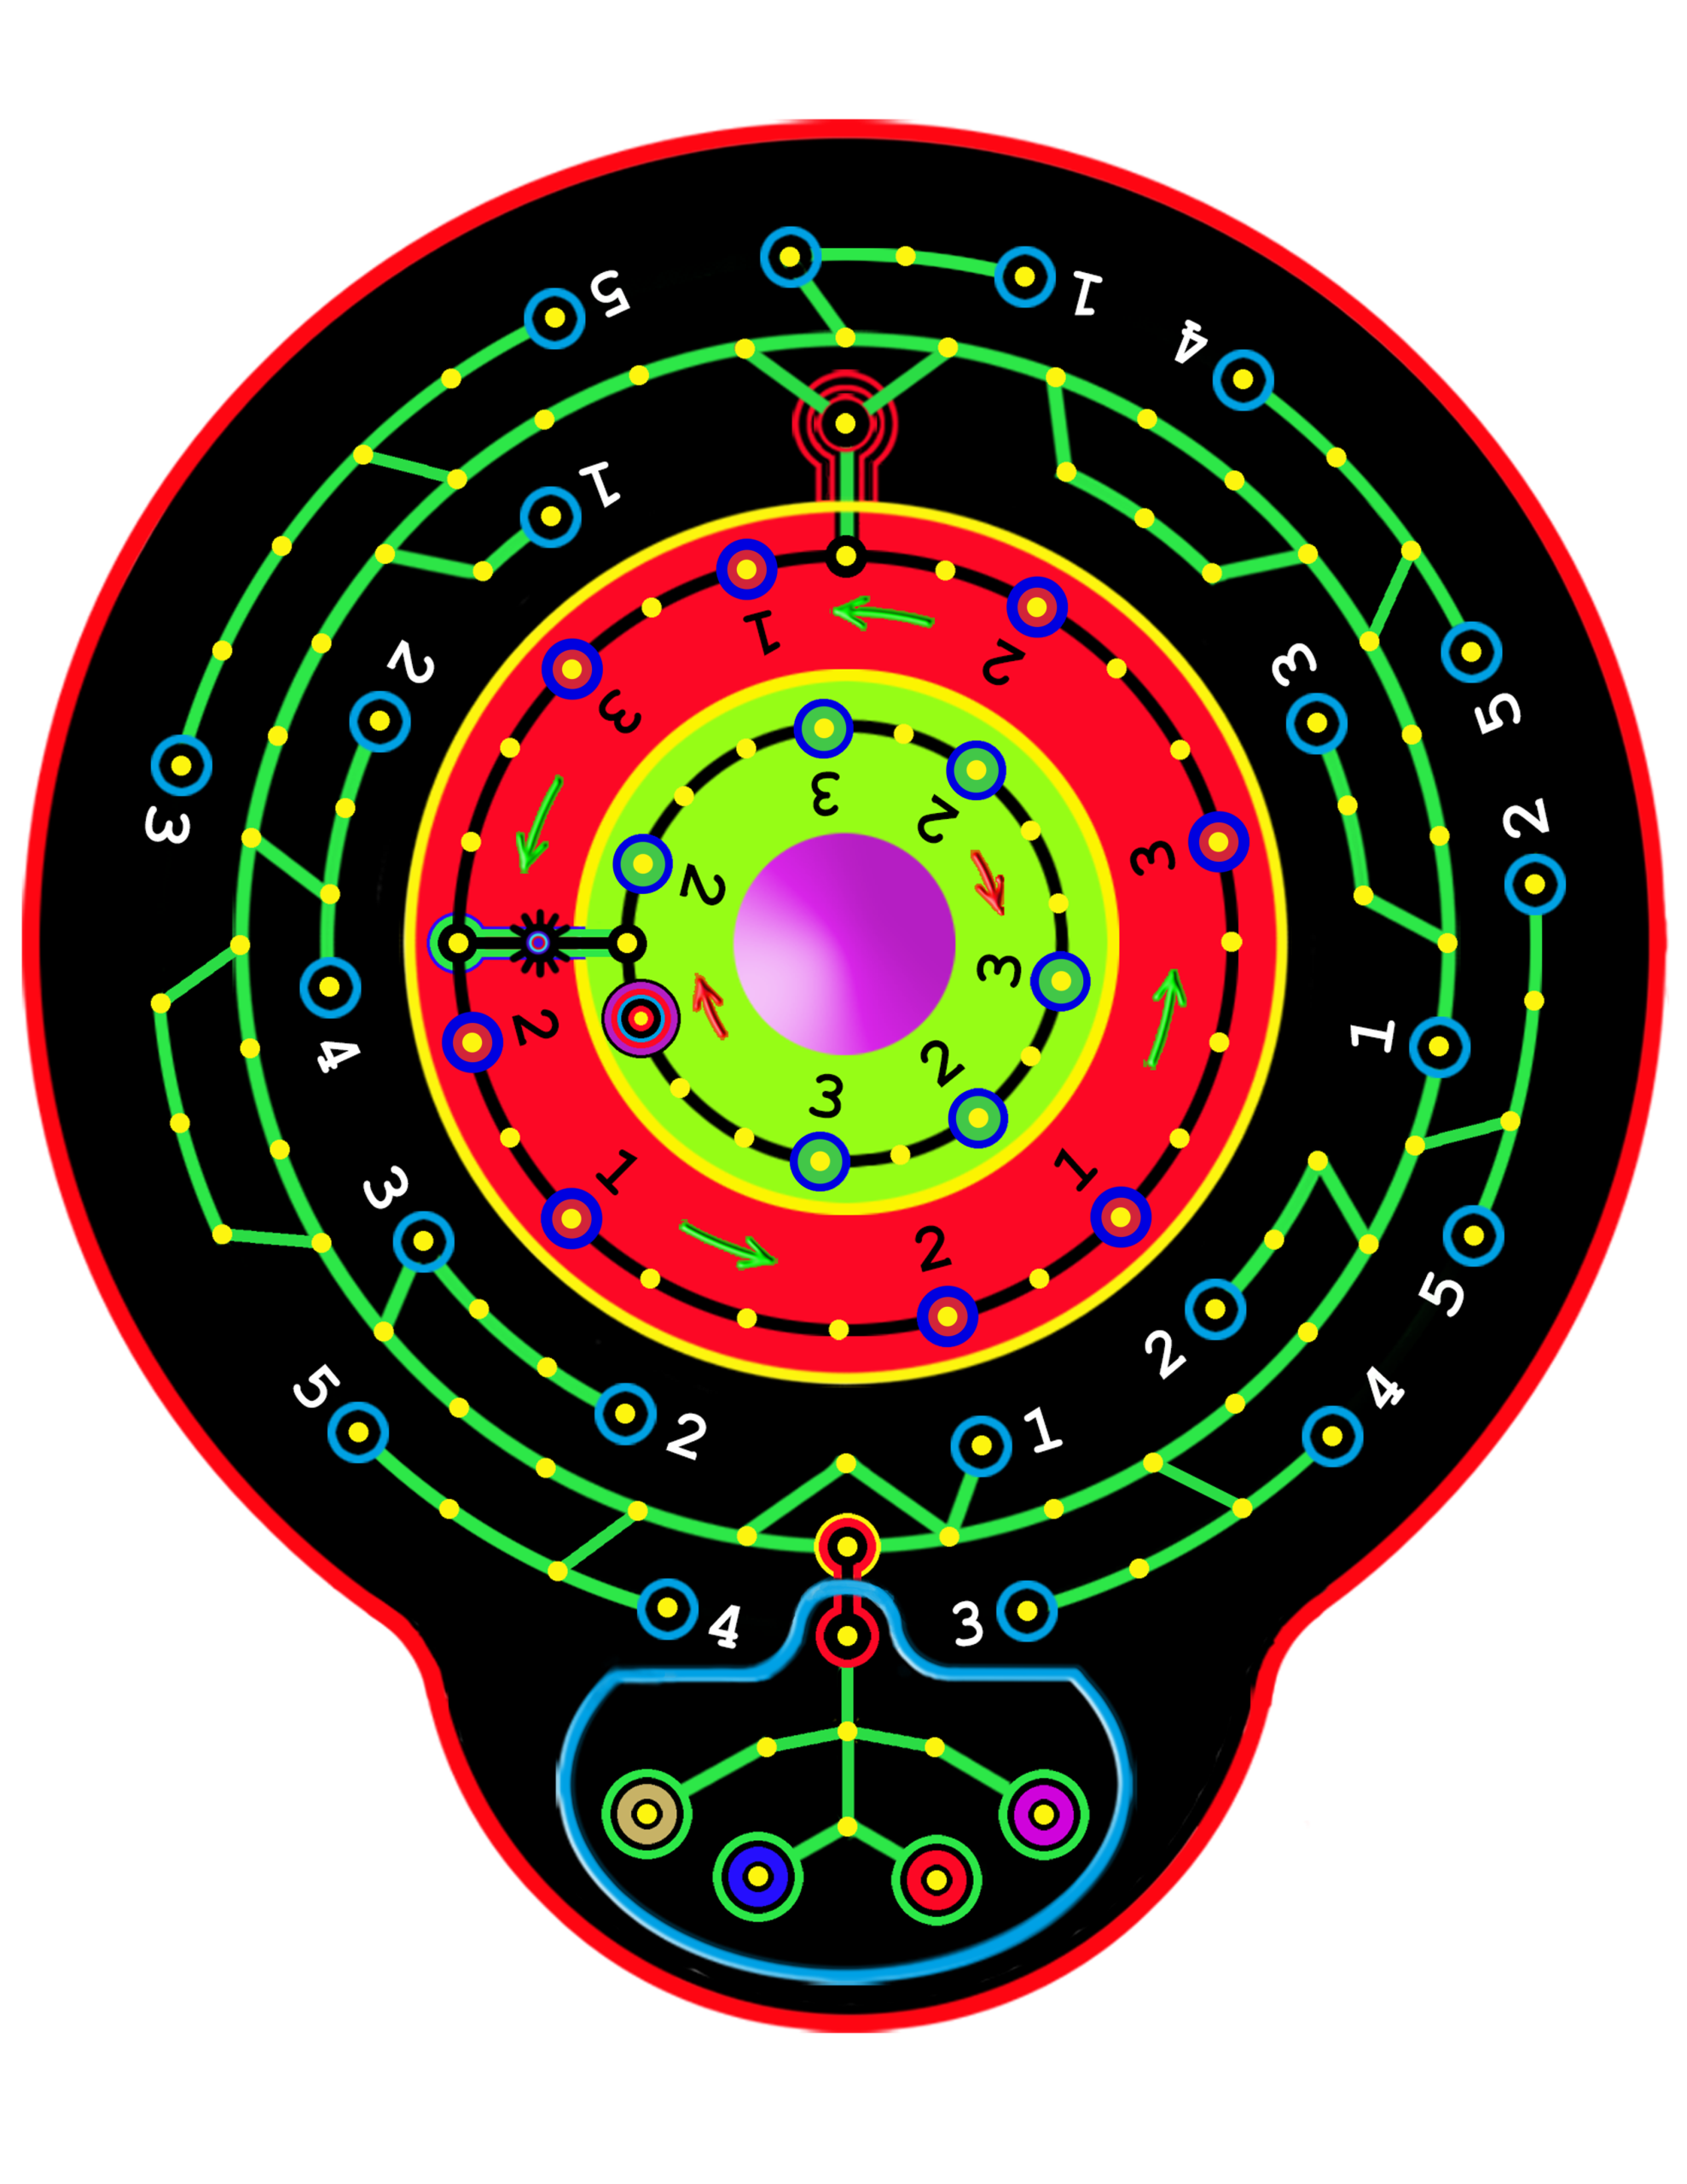
The first step in making a simple version of Orbital Summation is to click the picture on the right, save the image to your hard drive, then print out a copy on an 8 1/2″ x 11″ sheet of glossy photo paper.
Follow the directions that follow. Further down the page I will show how to use a wooden board for the base instead of foam.
Please read all the instructions before starting the project.
Make an Orbital Summation game using foam poster board
There are two ways of gluing the print to the posterboard.
Method 1
1. Cut a piece of foam poster board using a razor knife into the shape of a rectangle approximately 10″ x 11″. You can leave the image as is on the 8 1/2″ x 11″ piece of photo paper or use scissors to trim the actual image to the edge. Place the image evenly on the foam board. Make a few light pencil marks on the poster board in a couple of spots next to all four edges of the image to mark the position.
2. Flip the printed image over and lay it on a piece of scrap poster board or cardboard. Use a couple of pieces of clear tape to secure the image to the scrap piece while glue is applied. The tape should only cover the image 1/16″ or so. The goal is to keep the image from moving while applying the glue. Use a water soluble craft glue that dries clear. Squirt a generous amount of glue on the backside of the photo paper image and then use a flat foam brush or scrap piece of poster board to spread it evenly all the way to the edges. Do not leave any bare spots.
Carefully flip the image over and line it up with the marks made earlier on the poster board. Using some tweezers to grip the paper may help the process and lessen the chance of getting glue on your fingers and the top of the image. Cover part of the image with a paper towel or rag and press down with your fingers, gently smoothing the top of the photo paper. Start at the center and work towards the edges. Be careful to not get the glue on the image itself. (If that happens quickly wipe it off with a wet paper towel.) Wipe away any glue that oozes out from under the image. Keep your fingers glue-free if possible. It is very easy to get small amounts on the image and ruin your hard work. When the image appears to be smooth and flat, cover it with a paper towel and place a pile of books or something similar on the top for a few hours while the glue dries.
Method 2
1. As in Method 1, cut a piece of foam poster board using a razor knife into the shape of a rectangle approximately 10″ x 11″ or larger. You can leave the image as is on the 8 1/2″ x 11″ piece of photo paper or use scissors to trim the actual image to the edge.
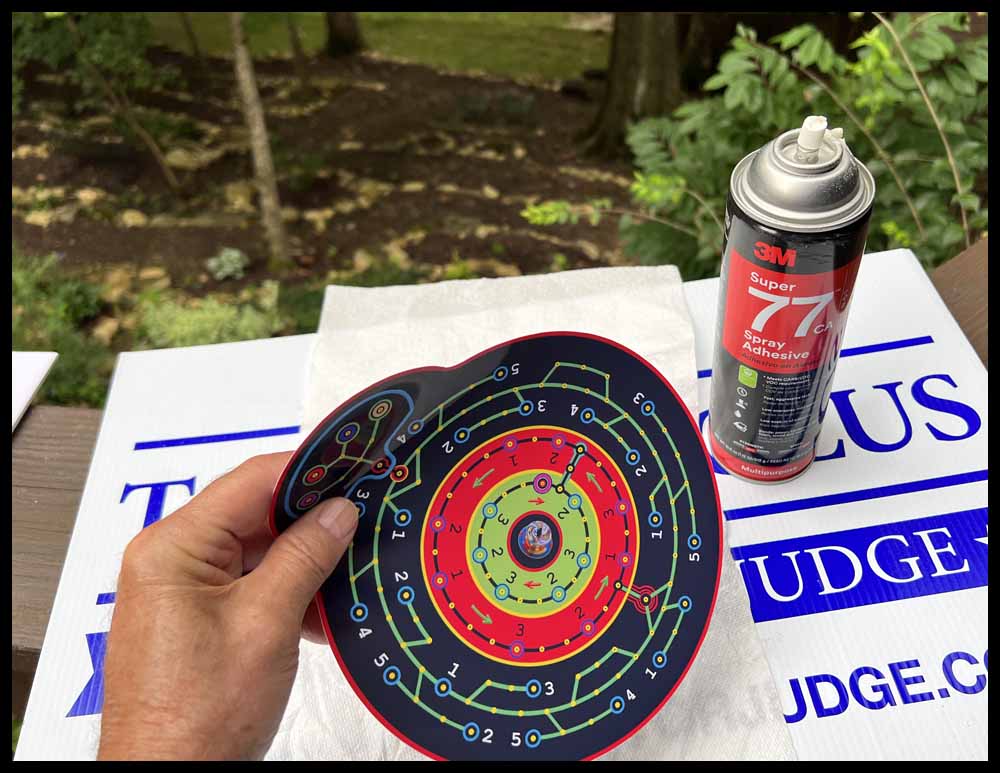
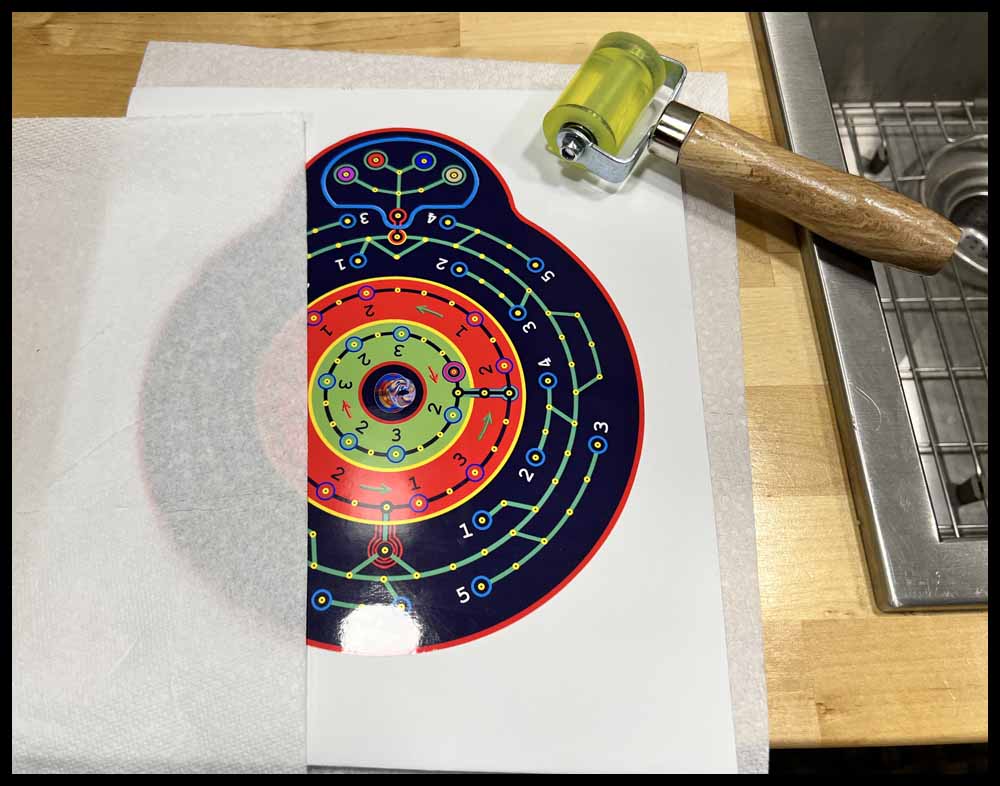
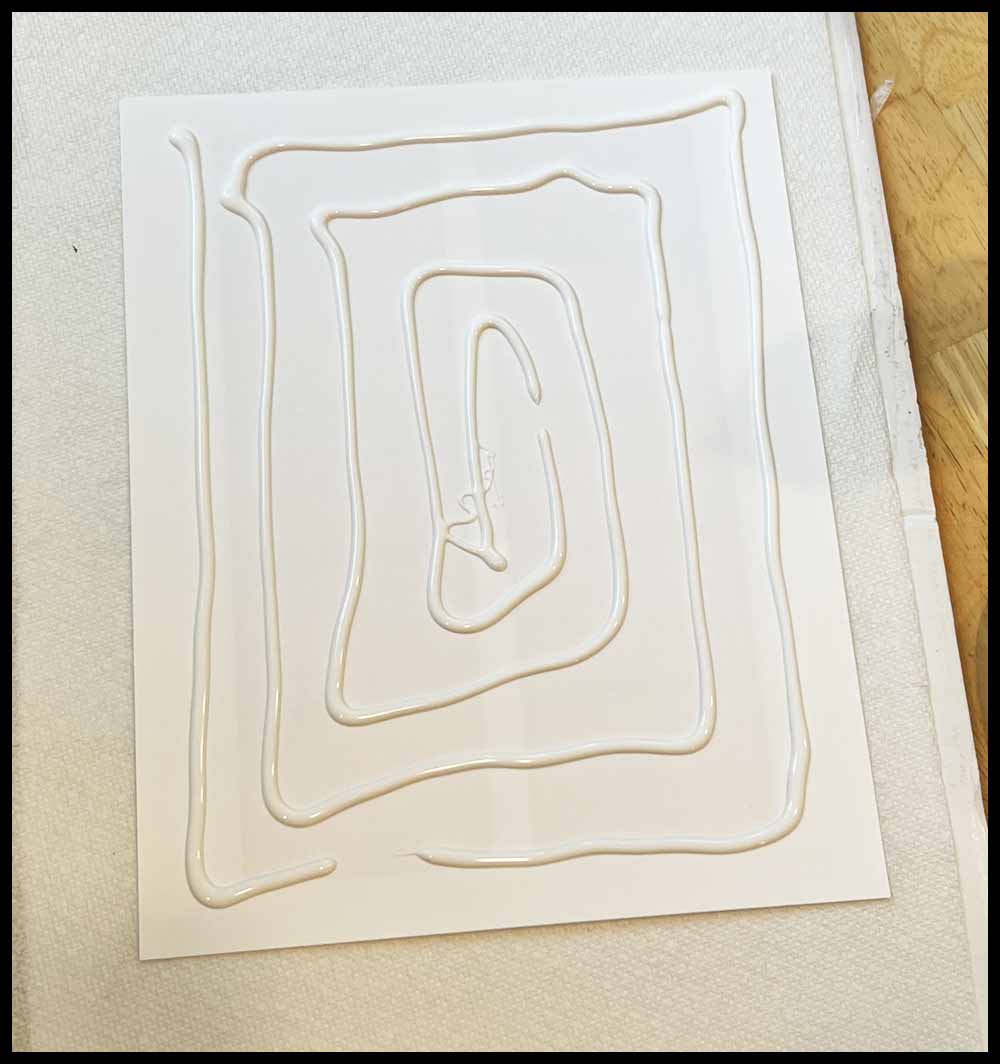
2. Use a can of spray adhesive to coat the bottom of the image. Lay it outside on a cardboard box or something similar with a paper towel underneath the image. Spray, wait the required amount of time, then apply it evenly where desired on the poster board. It doesn’t have to be in the exact final position. Use your hands and fingers to apply pressure to the glued image or use a small roller to make sure it is smooth and flat. After it dries, retrim the poster board as desired. I suggest practicing first with scrap material first. Using Method 1 allows the image to be slightly moved, but when using spray adhesive, the image will remain where it is placed.
After using both methods, I prefer using the spray adhesive over the bottled glue. But different situations may call for different methods.
Continue making the orbital Summation game on posterboard
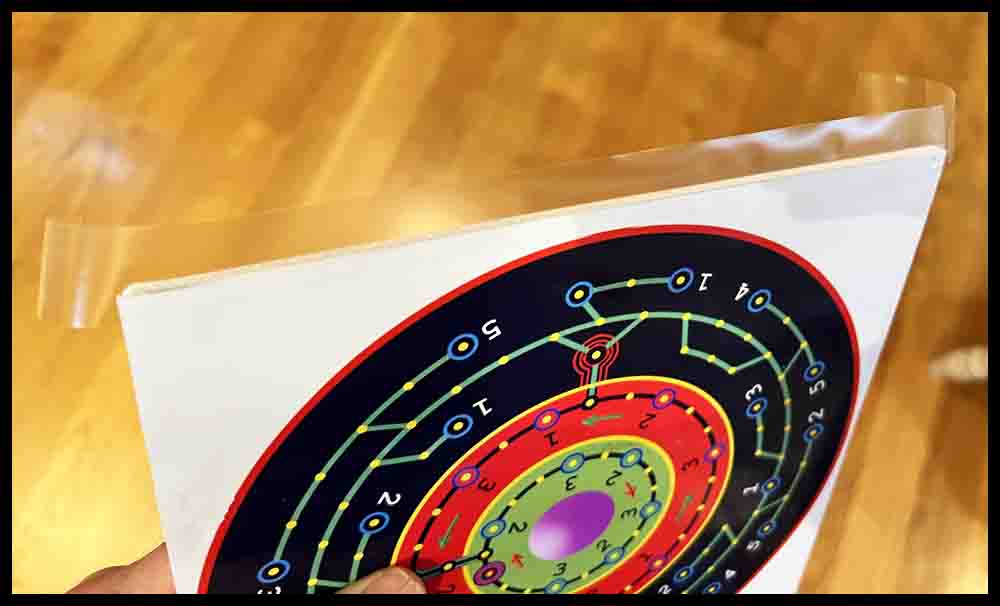
3. Color the edges of the board with a permanent marker if desired. Tape the edges with clear tape to seal the poster board from moisture and dirt.
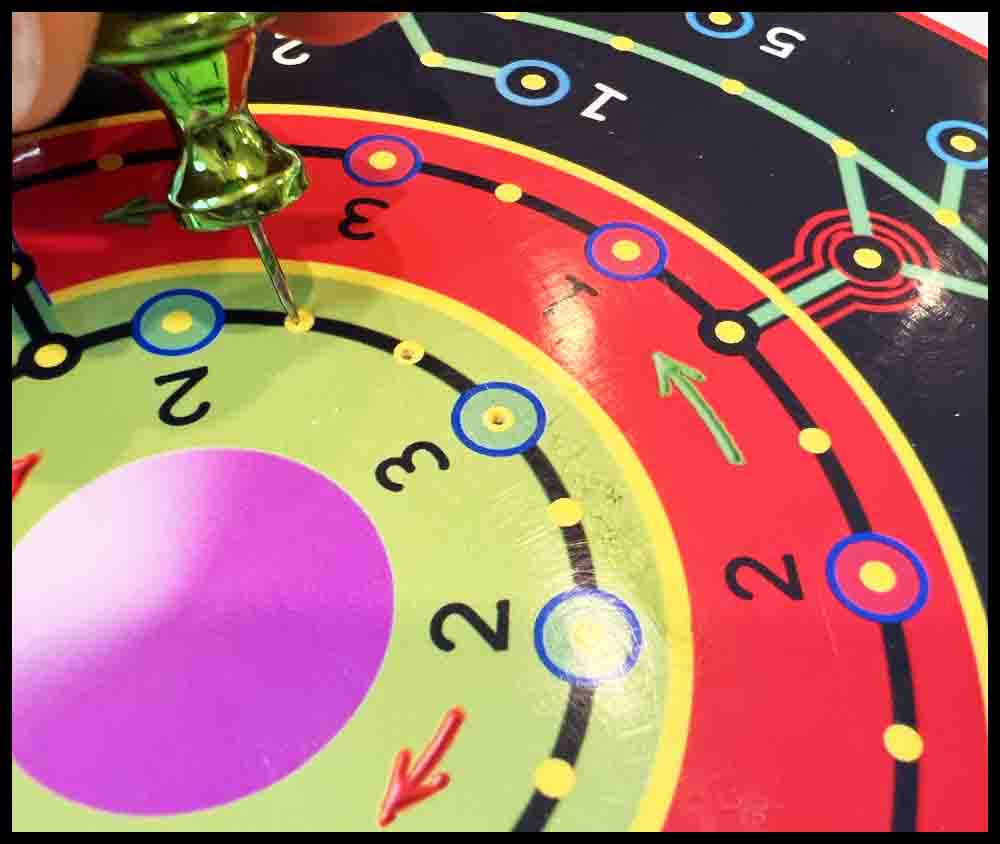
4. Using a push pin or steel scribe, make a mark in the center of every hole. The hole does not need to pierce the bottom of the foam. The holes will be opened up to a larger diameter in Step 5.
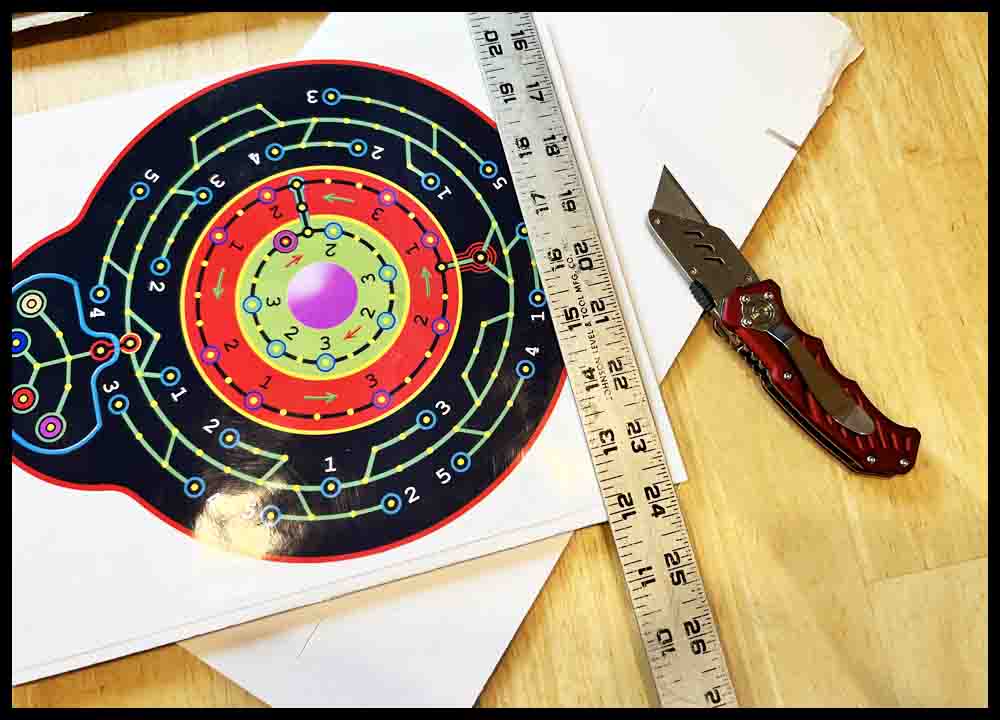
Tools for Piercing Holes in Foam Poster Board
Click the pictures for a bigger view.
A. The first tool in the top picture is a push pin. It works great for piercing the initial holes through templates made out of cardstock used for making Octosory and Aggarv8ion. For Rainbow Raceway and Orbital Summation, push pins are used for the initial mark in the image of the game that was printed out.
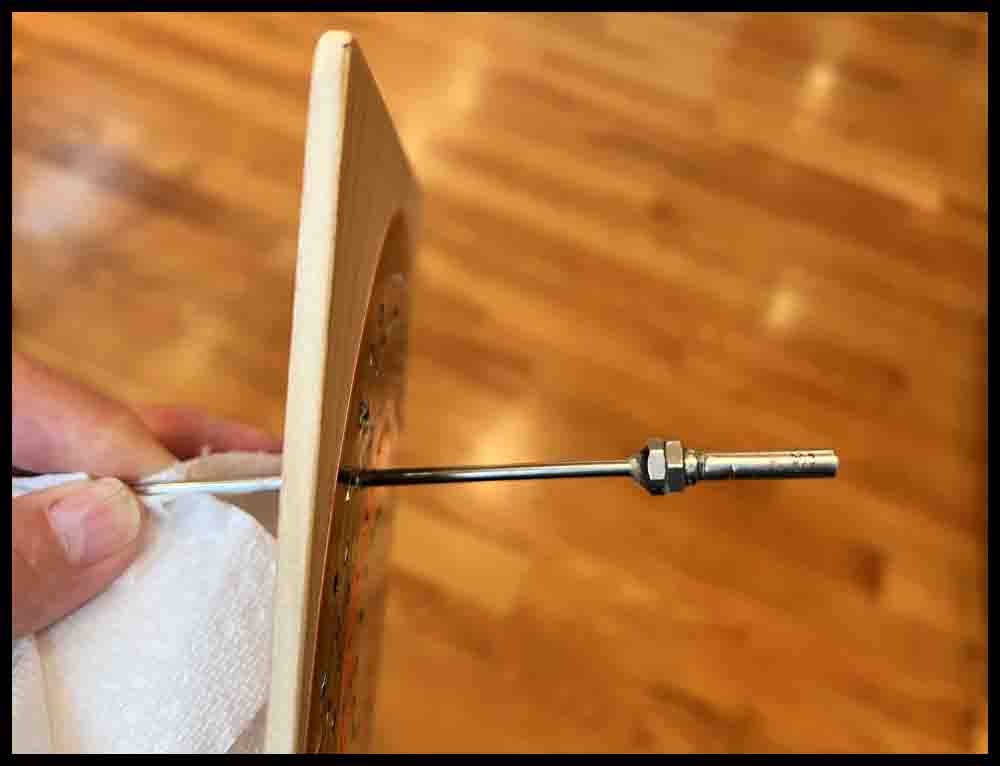
B. The metal scribe shown below the pushpin is a great choice to use as a center punch on wooden bases that have been pre-marked with a push pin. The enlarged view of the tip is just to show this particular tool. The important part is the nice sharp point.
C. The third tool from the top is a homemade scribe I have used for years. This is the perfect size (1/8″ diameter) for opening up the small holes initially made in all of the foam boards. The sharp point assures the hole location is picked up accurately. Search for a similar pointed awl or scribe in a hardware store or use a screwdriver like the small one described below in D.
D. The Phillips screwdrivers offer three different sizes for piercing clearance holes. The small one (.120 dia.) can be used the same way as the homemade scribe above. The point is small enough to pick up the initial small holes made in the poster board, although it might be helpful to grind more of a point on it with a belt sander.
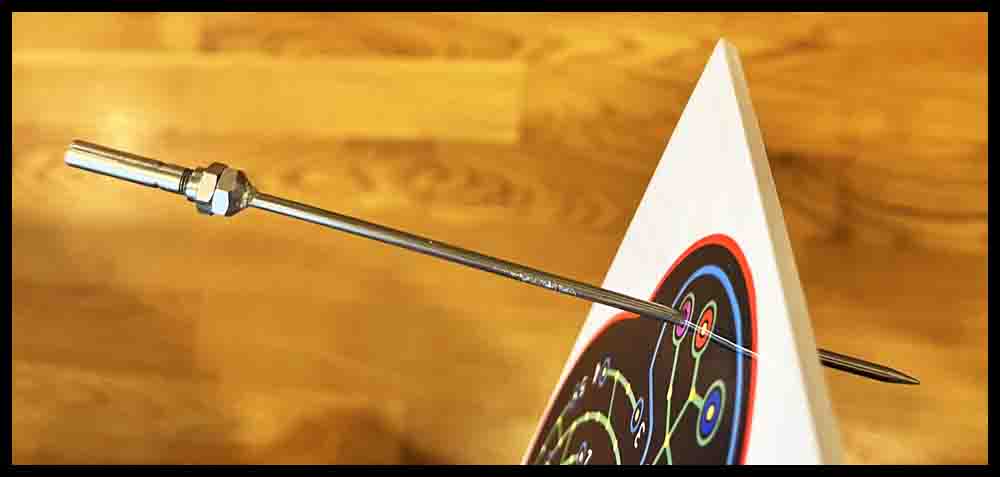
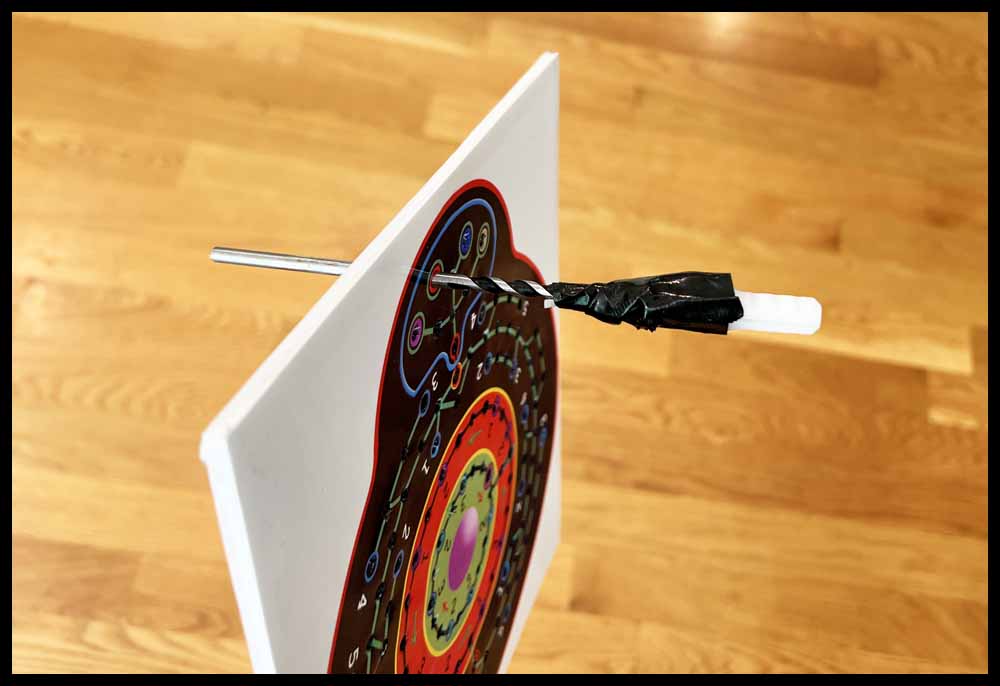
E. Two games will use a slightly smaller diameter piercing tool. Orbital Summation and the smaller version of Rainbow Raceway use #6-32 screws to make the game pieces. The tools shown in the lower picture were both made from drill bits found around the garage. The shorter drill uses a wire nut for a handle. On the longer carbide drill I found a plastic drywall insert to use as a handle. Both handles are taped on with duct tape.


Continue with the following steps to complete the poster board game.
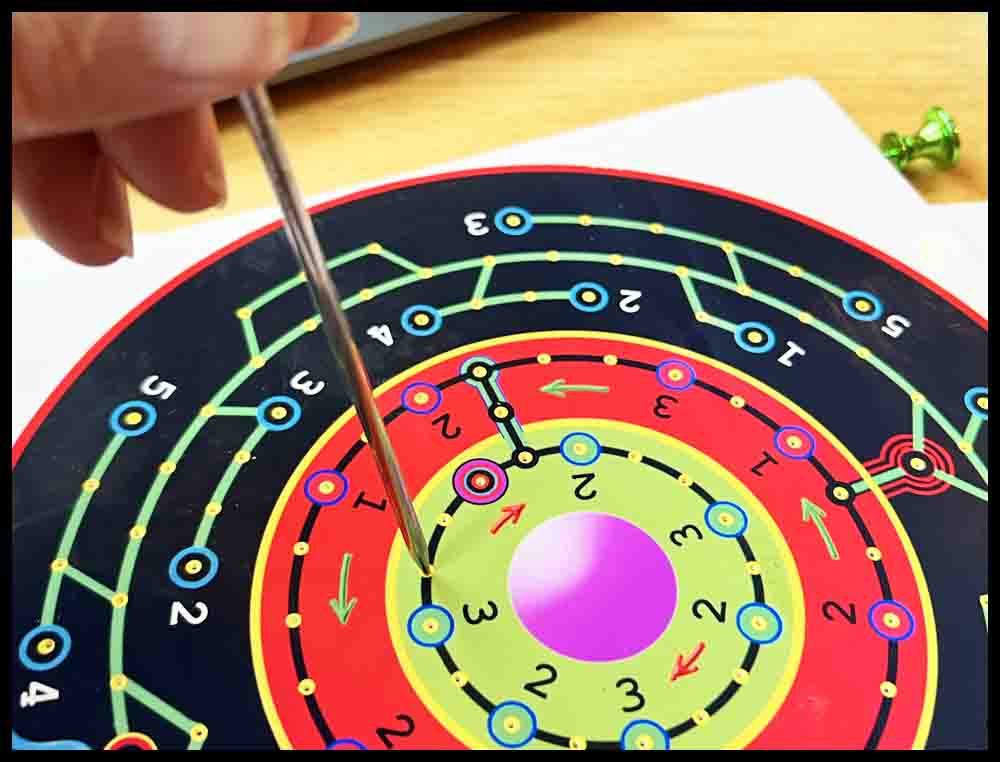
5. Open the holes up all the way through the foam board with a round tool that is approximately 1/8″ diameter. It must have a sharp point for accurately opening up the holes marked in Step 4. One that is similar to the scribe shown above on line C will work well.
6. After all the 1/8″ holes are pierced through the foam board, use a bigger tool (approximately 11/64″ or .172″) to open the holes up to the final size. Practice on some scrap foam first to get the right combination of tools to make the job easy.
7. Try a game piece (6-32 screw) for fit. Different foam boards, due to the material and thickness of each brand, may not all pierce the same. If the screw is tight, go around all the holes again with the 11/64″ tool and wiggle it in a circle with the tool at a slight angle to smooth and enlarge the hole further. Try not to make the hole too big or elongated.
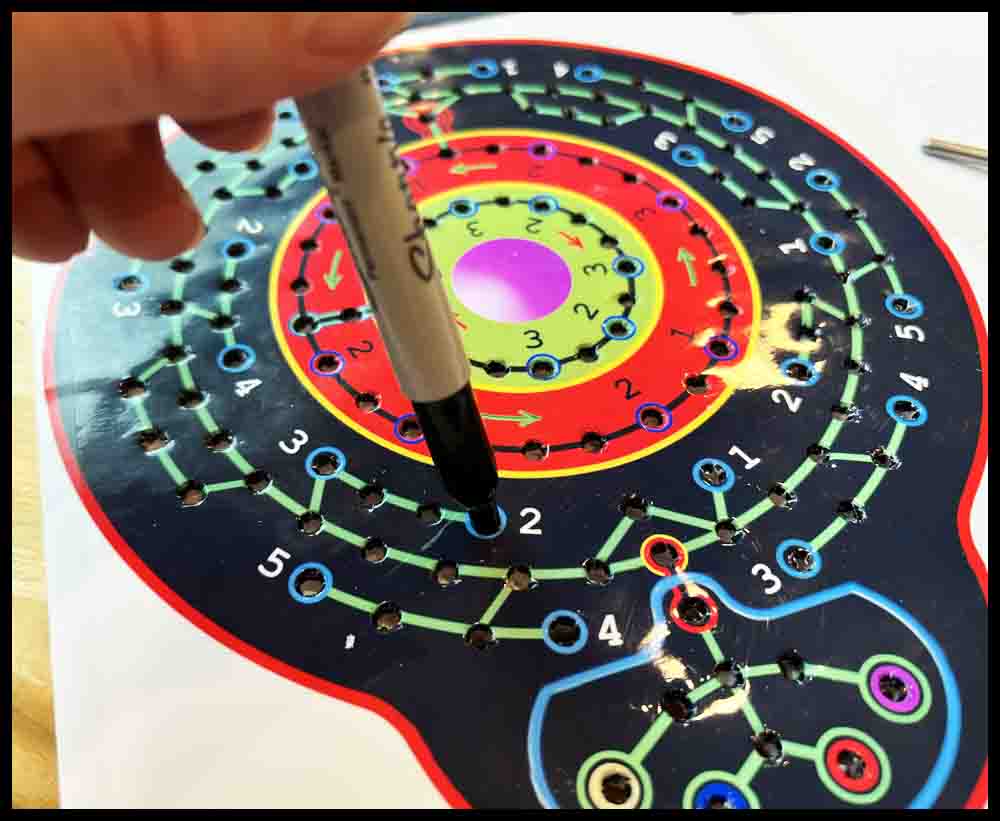
8. The gameboard is almost finished. Decorate the foam board as desired. If the holes are a little ragged looking, use a permanent marker to blacken the edge of the hole. Just push it straight down in each hole. (As always, practice first on scrap. You don’t want to ruin the game at this point.)
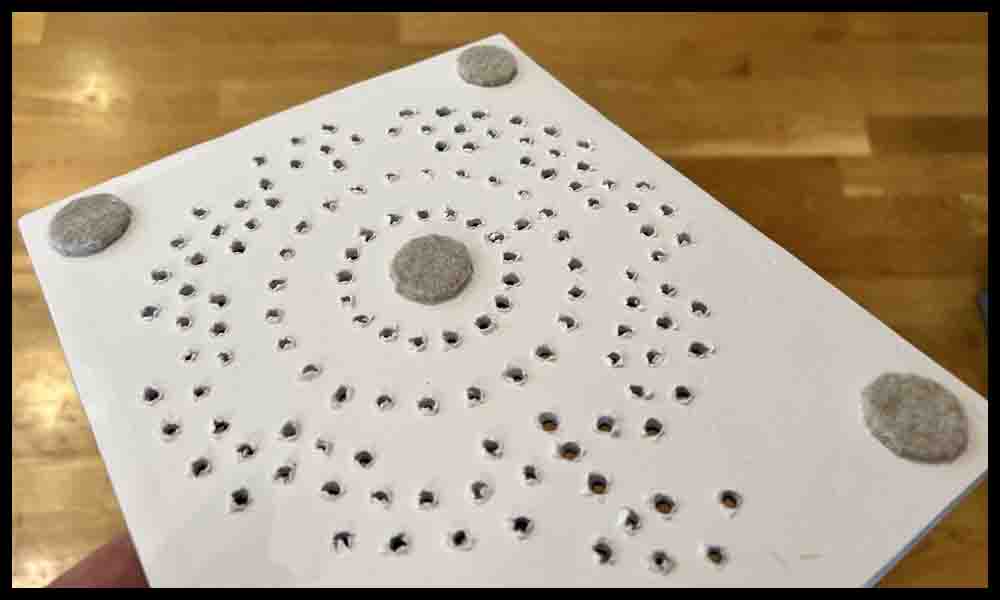
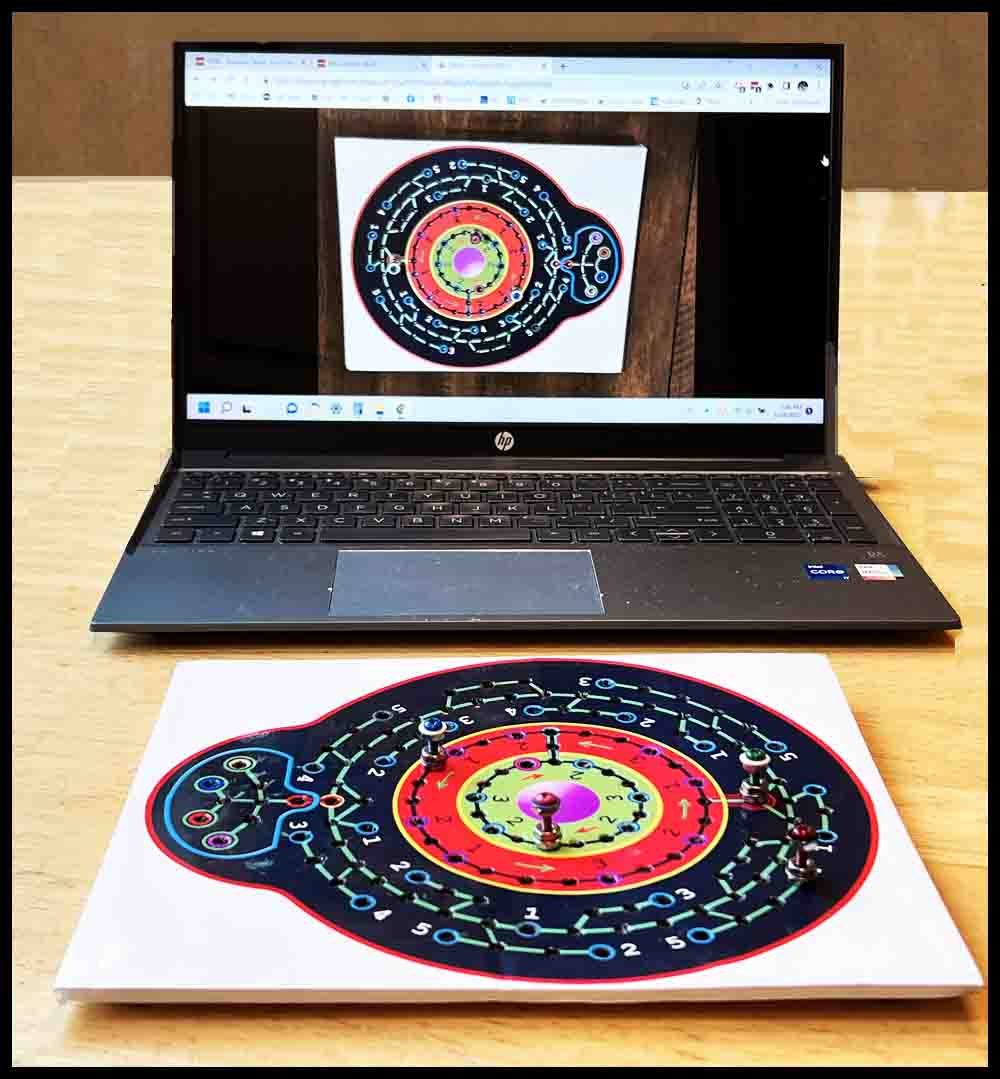
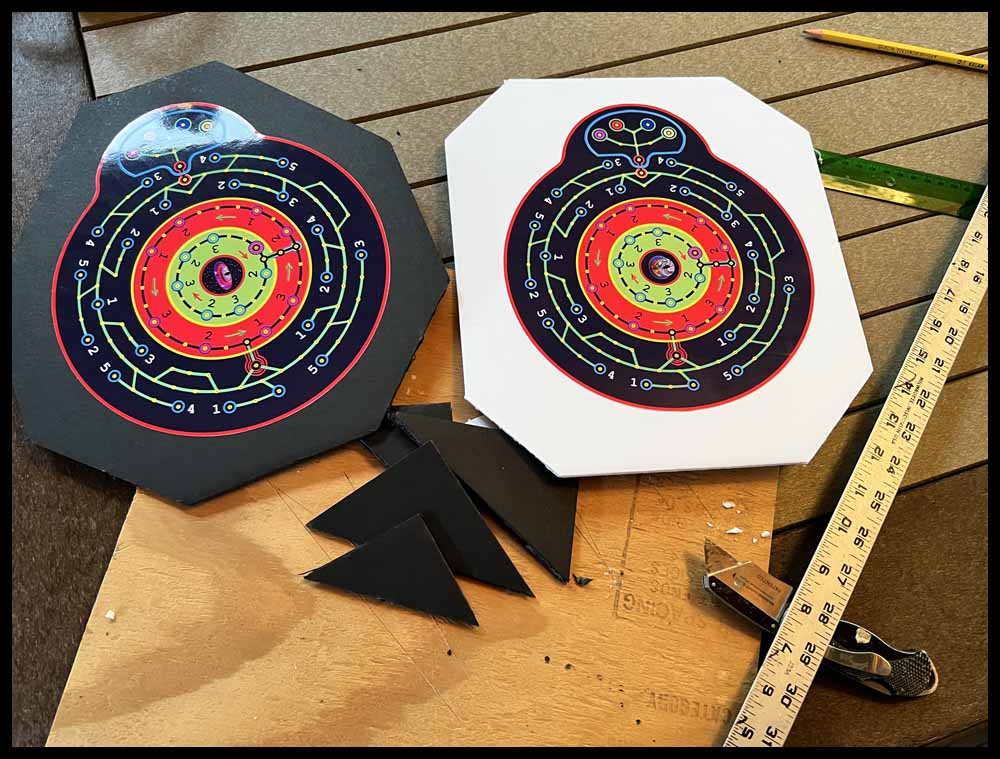
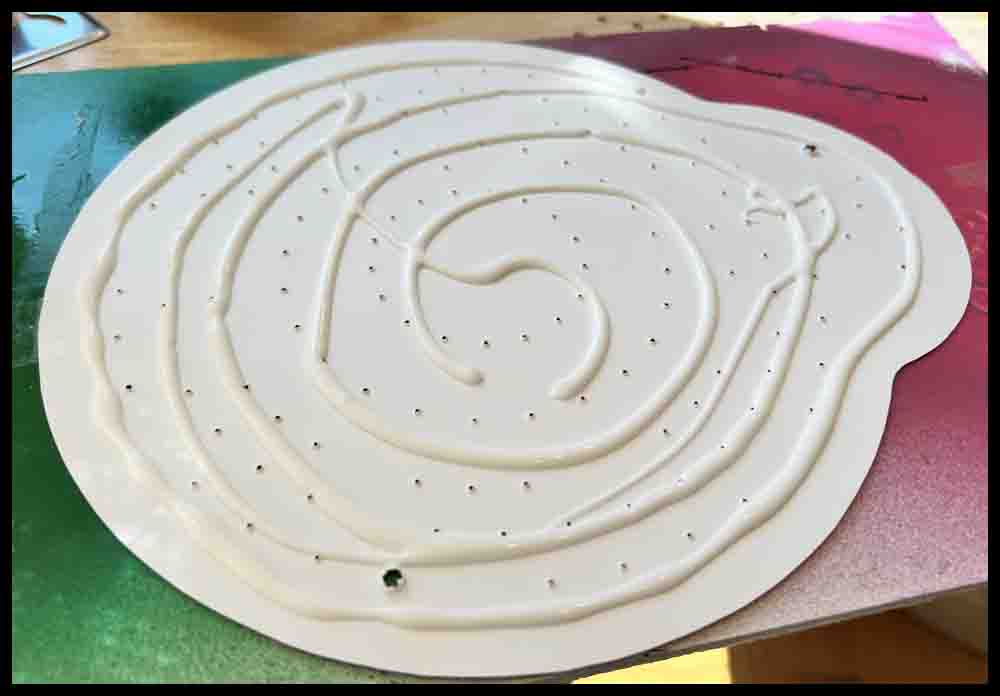
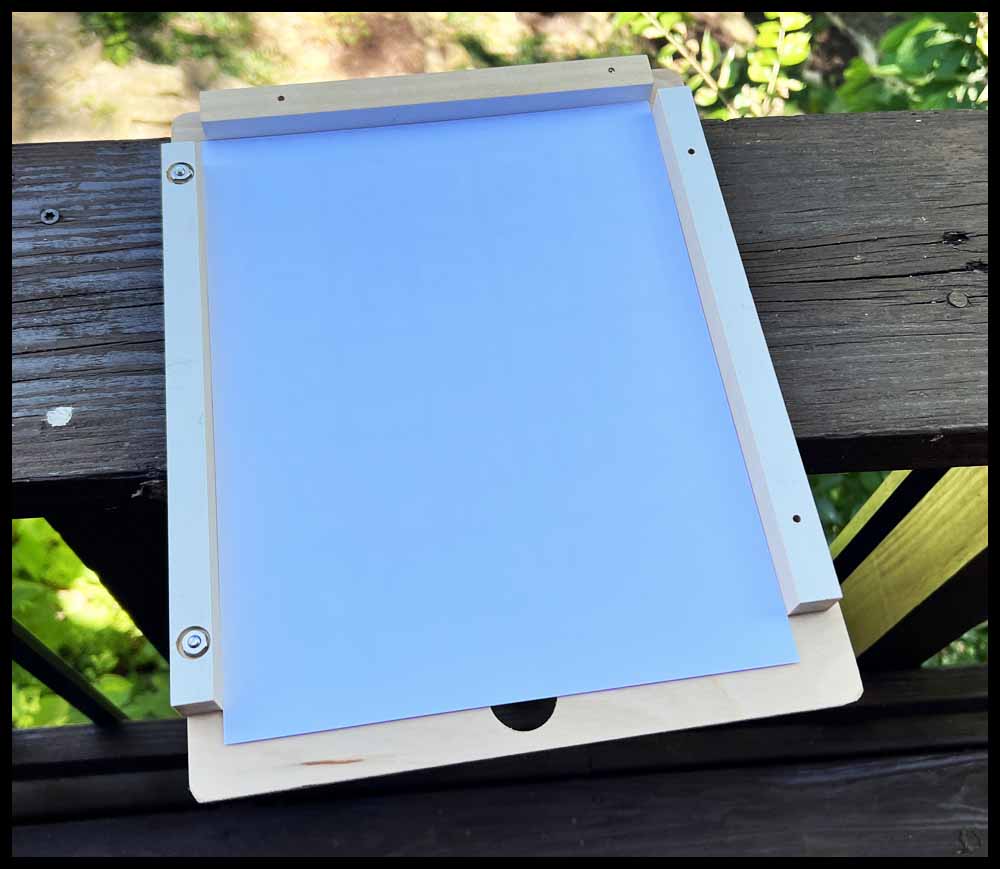
The finished board is shown on the left.
If desired, the foam board may be cut right to the edge of the Orbital Summation image, but I learned from personal experience that the foam board does not cut well with scissors. Maybe a sharp razor knife would work better.

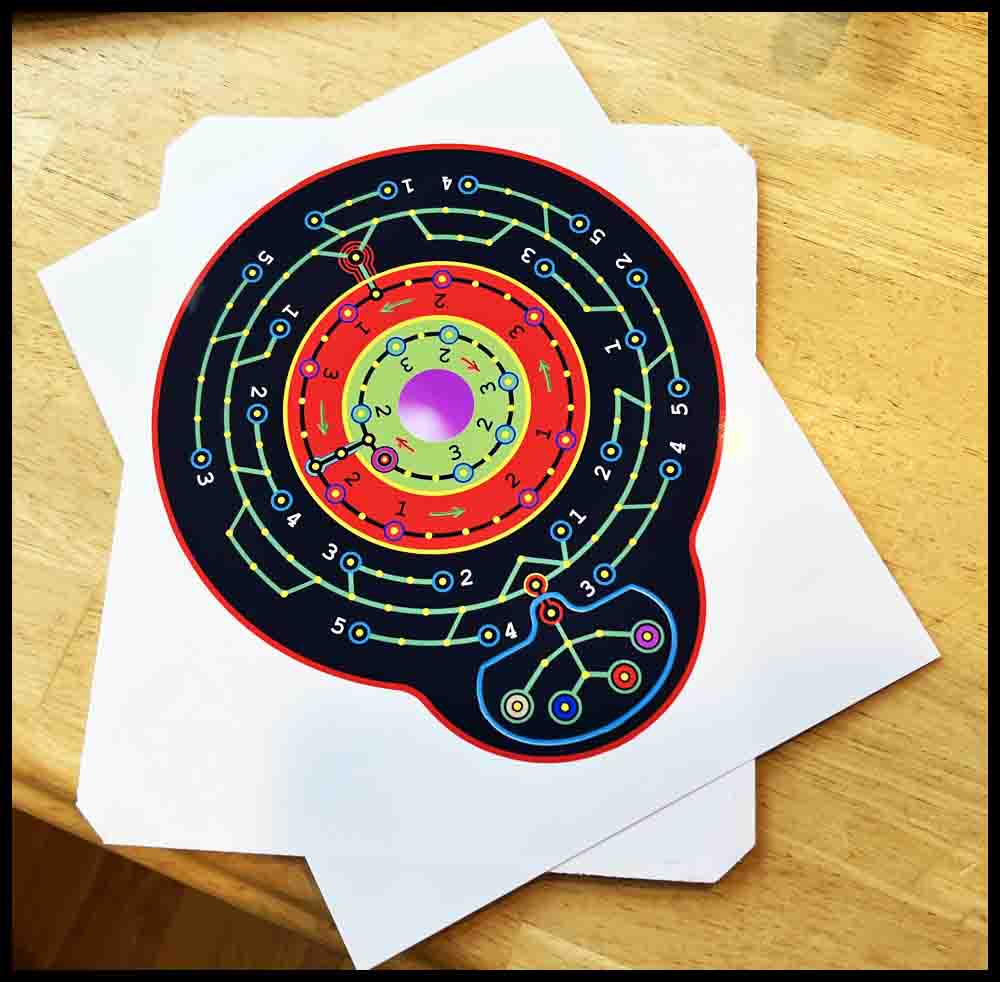
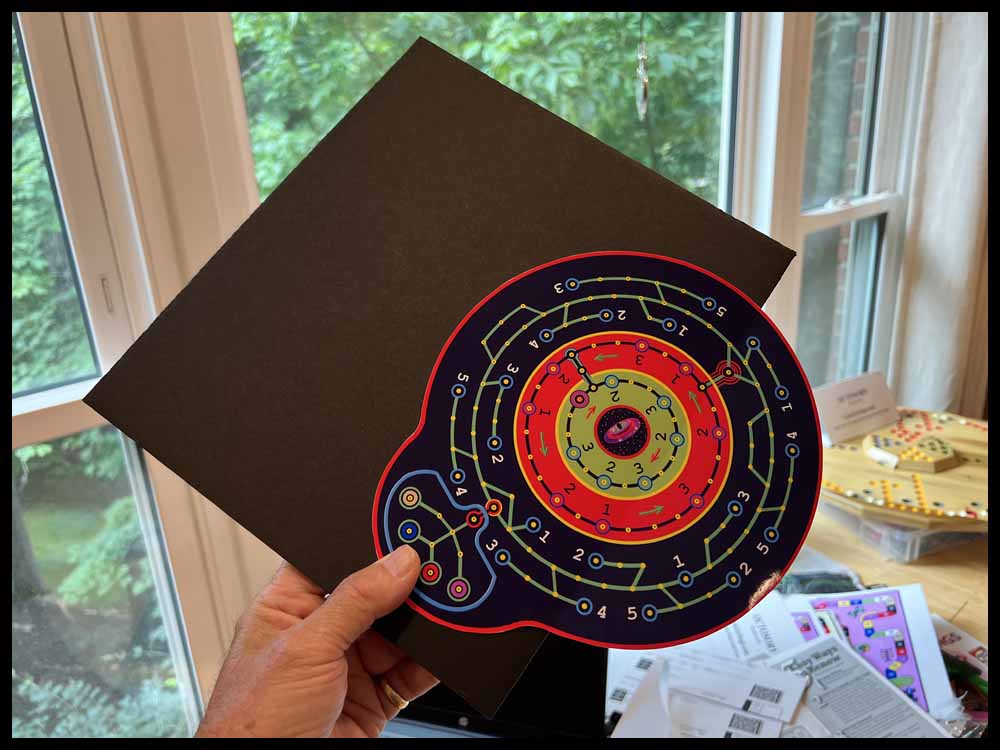
The following pictures show the construction of an Orbital Summation game on black posterboard using spray adhesive.
To play the game, you will need two eight-sided dice numbered 1-4 twice on each die. You will also have to make some number cards and space Scooters (game pieces). Information on the dice, number cards, and game pieces can be found near the bottom of this page. To print off the rules for Orbital Summation, click the green button.
Make an Orbital Summation game using a wooden board as a base.
The foam poster board used above makes a nice game without much time or effort. But for a really sharp looking board game, follow the directions below to construct a game with a wooden base.

Materials required
1. Piece of wood for the base. There are plenty of options; a 3/16″ thick furniture grade piece of plywood was used in this example.
2. Glossy photo paper 8 1/2″ x 11″.
3. Three or more pushpins, a scribe with a sharp point to use as a center punch and a 1/8″ diameter tool for piercing holes. See the picture above in the foam board directions. Substitute any tools you may already possess that will do the job. The end result is what is important.
4. A water soluble glue that dries clear.
5. Drilling tools: Small drill bit for initial holes (see below), 5/32″ drill bit, and a 5/32″ reamer. A small countersink is great for deburring holes on the bottom. A small drill press would be helpful. :-). I am sure a hand electric drill will work, too, but it may be a bit harder to use.
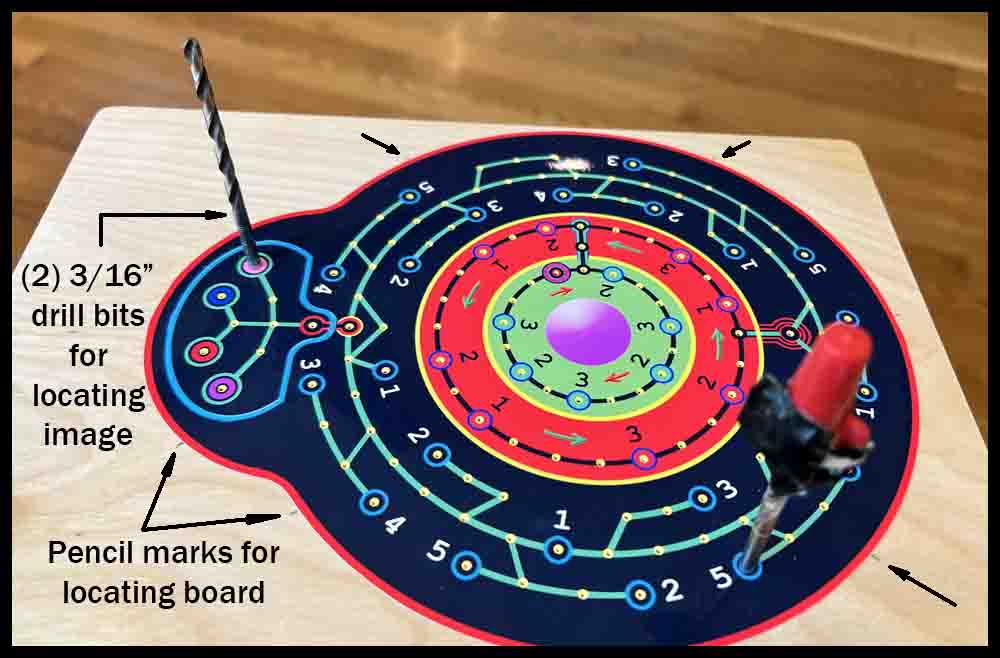
6. Two locating pins. The bottom of two 5/32″ drill bits will work fine. Other possibilities are #8 screws or 5/32″ dowel pins.
7. Miscellaneous tools: 3/8″ center punch for smoothing hole tops, hammer, clear tape, measuring scale or tape measure, and other tools such as scissors, saws, etc..
Directions
1. Prepare a wooden base by cutting a board in the shape of a rectangle 9 or 10″ wide x about 11″ long. This is a basic size that works well, but really any size or shape will result in a cool looking game. The board in this example is a bit longer than 11″. Sand the board and paint it any color of your choice or spray on several coats of polyurethane, depending on what finish is desired.
2. Printout the image of the board at the top of the page on good glossy photo paper.
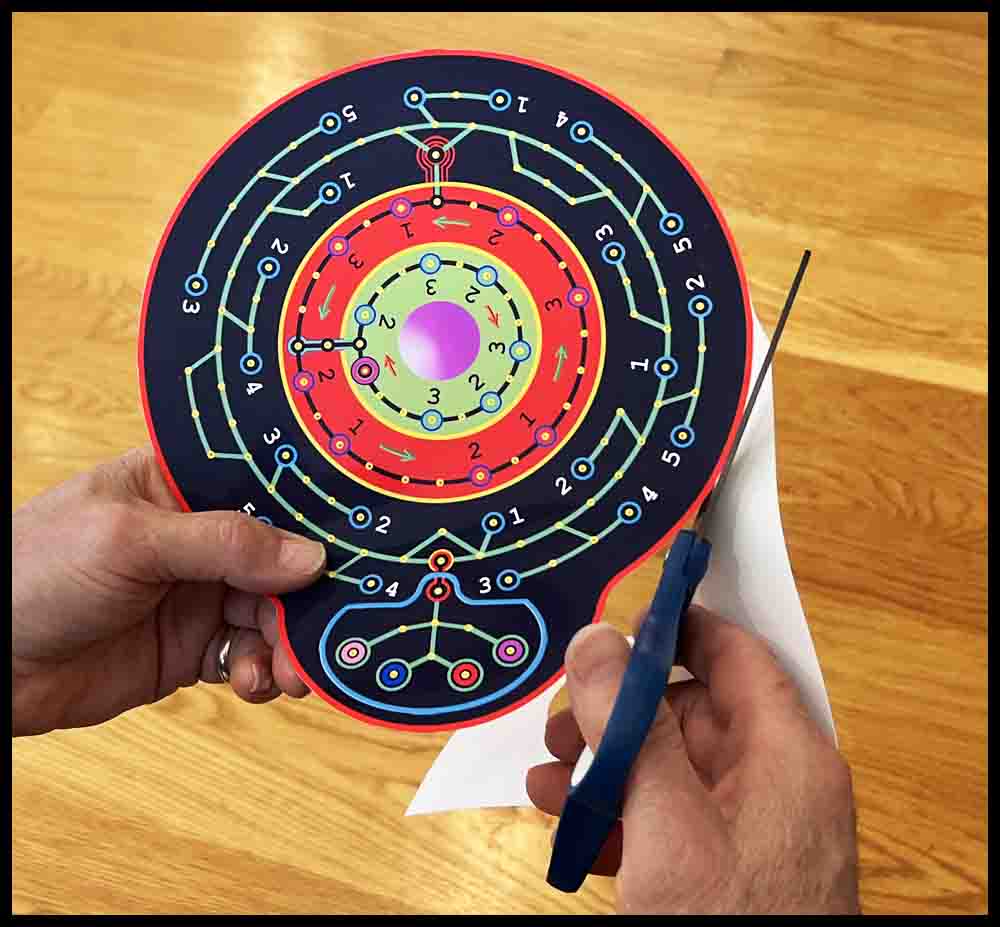
3. There are two choices available: Cut out the image around the red border with scissors OR trim the whole 8 1/2″ x 11″ sheet into a rectangle any size that you desire. For this example I cut the image out around the red border. (very carefully) 🙂
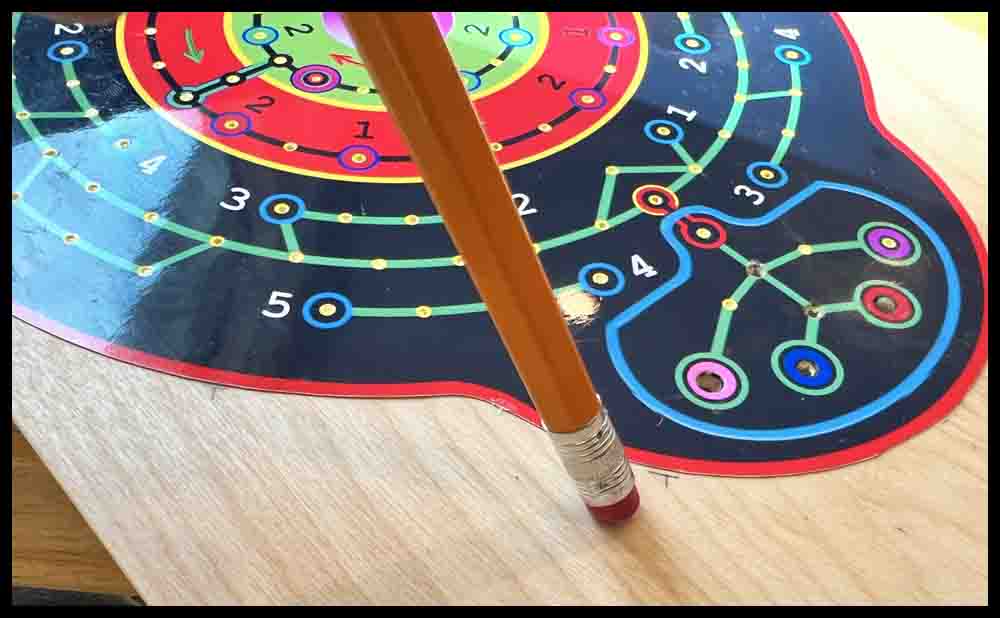
4. Position the image exactly how you want it on the board. Pick three holes, each near an edge, to stick pushpins through to locate the image. Lightly tap them in vertically with a small hammer far enough to keep the image from moving when transferring the holes. Use a sharp pencil to make 6 to 8 light marks about 1/8″ long around the perimeter of the image. This will help return the image to the same position in later steps. These pencil marks will be erased in a later step.

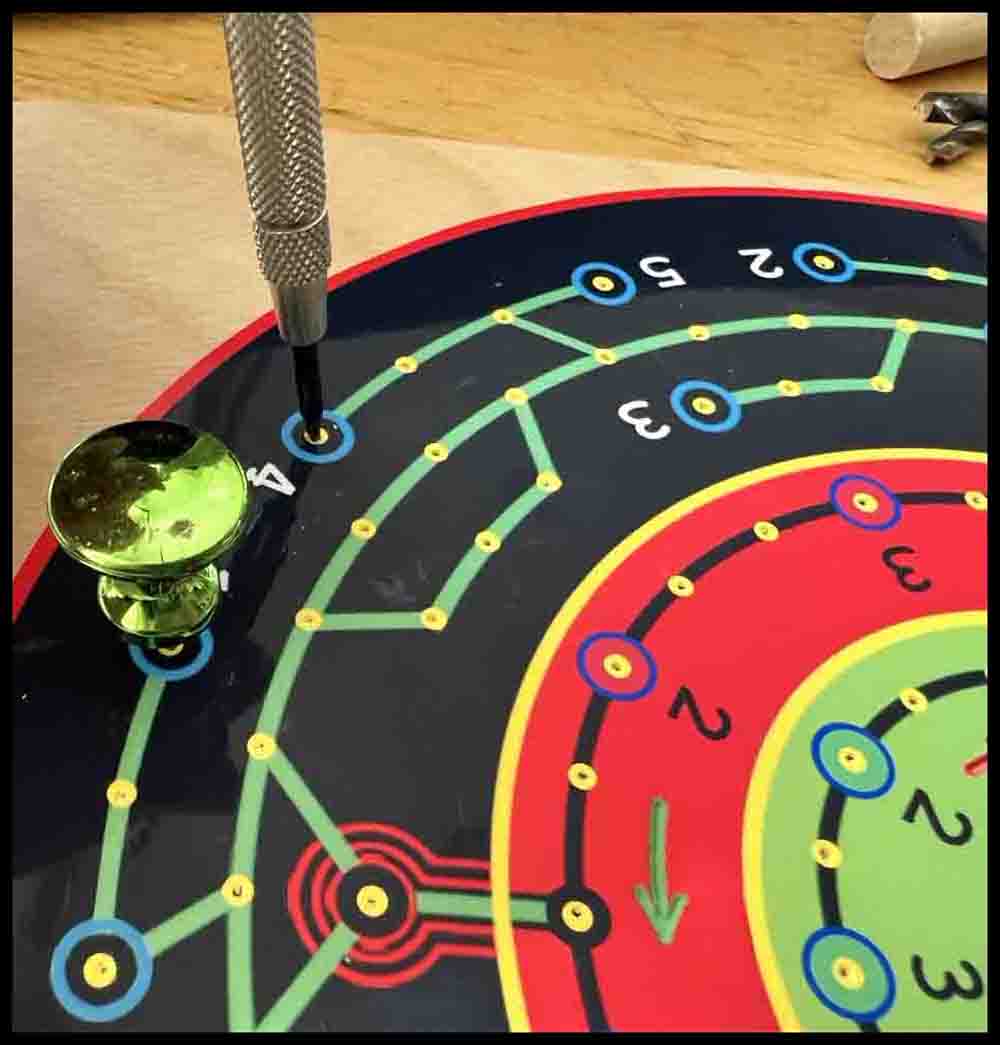
5. Use a sharp pointed scribe like the one shown above. Carefully position the scribe above the center of each hole, making sure it is vertical. Tap it with a hammer to make a prick mark in the wooden board.
6. After transferring all the holes, remove the push pins and the image. Go back to all the prick marks made in Step 5 and use the hammer and scribe to make the marks a little bigger and deeper. (Don’t forget the three holes where the push pins were.) Keep the scribe vertical so the prick mark does not move off location. If you have any doubts whether the prick marks are deep enough, make a few similar prick marks in a piece of scrap and then use the small drill from Step 7 to drill holes in the scrap. The prick mark should be wide enough for the drill to easily pick up the hole location without spinning off sideways.
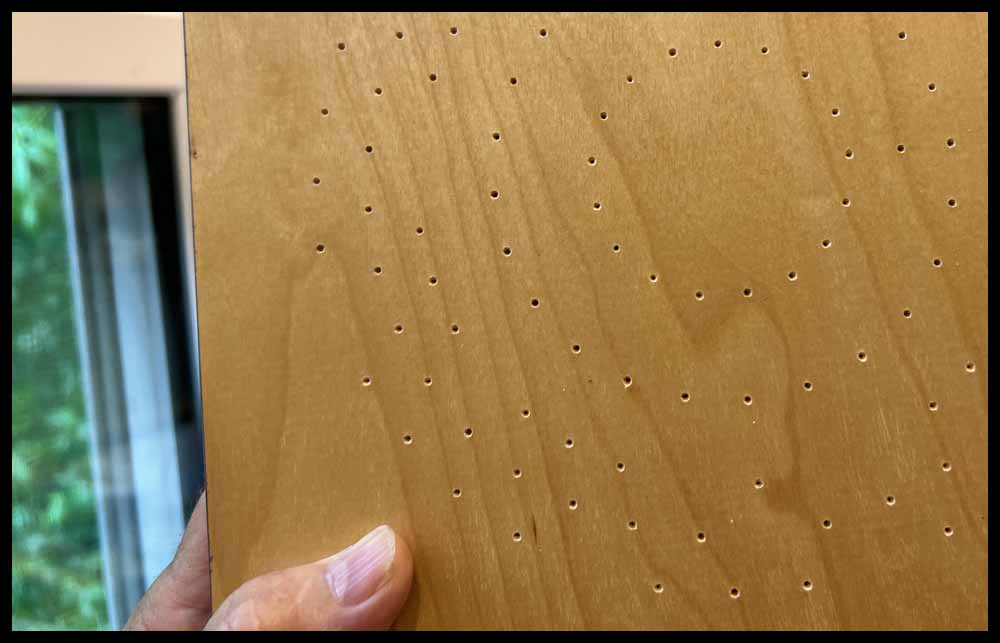
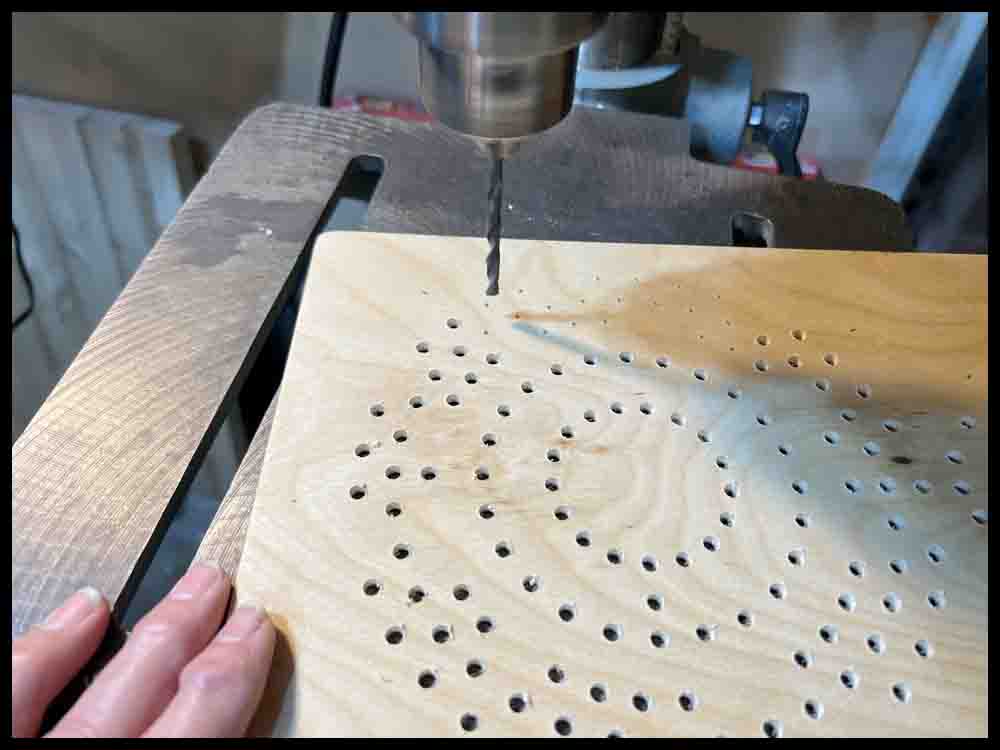
7. Get ready to drill the holes. A drill press is much easier to use for this procedure than a hand drill, but use whatever tool you have available. The drill bit that was used in this example is a # 48 drill, or .076″ diameter. Select a similar small size that will pick up the prick mark accurately when drilling.
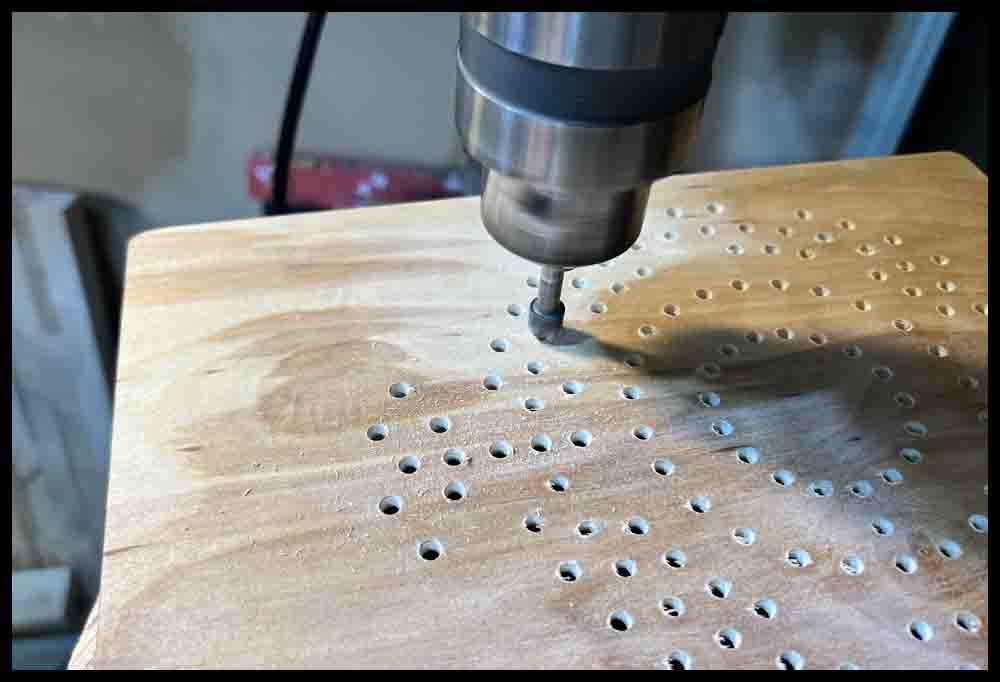
8. Drill all the holes, then switch to a 5/32″ drill bit and open up the holes to the new bigger diameter.
9. Flip the board over and use a small countersink to deburr the holes. Sand the top and bottom surface to remove any splinters or rough edges.
10. Lay the image upside down on a piece of paper towel on a table or other smooth surface. Place another piece of paper on top, then press down on the image with your fingers or the smooth bottom of a screwdriver over the pierced holes. The intention is to flatten the tiny holes previously pierced.
11. Grab a roll of clear tape and cut off small strips, covering all the tiny holes that were just flattened. This will prevent any glue from seeping through the holes and possibly messing up the top surface.
12. The hardest part of this project is gluing the image to the board. Using liquid craft glue is probably the best method when gluing the image to the board in the same exact position as before.
Using spray adhesive (Method 2 above) may result in the drilled holes not matching up with the drilled holes in the wood.
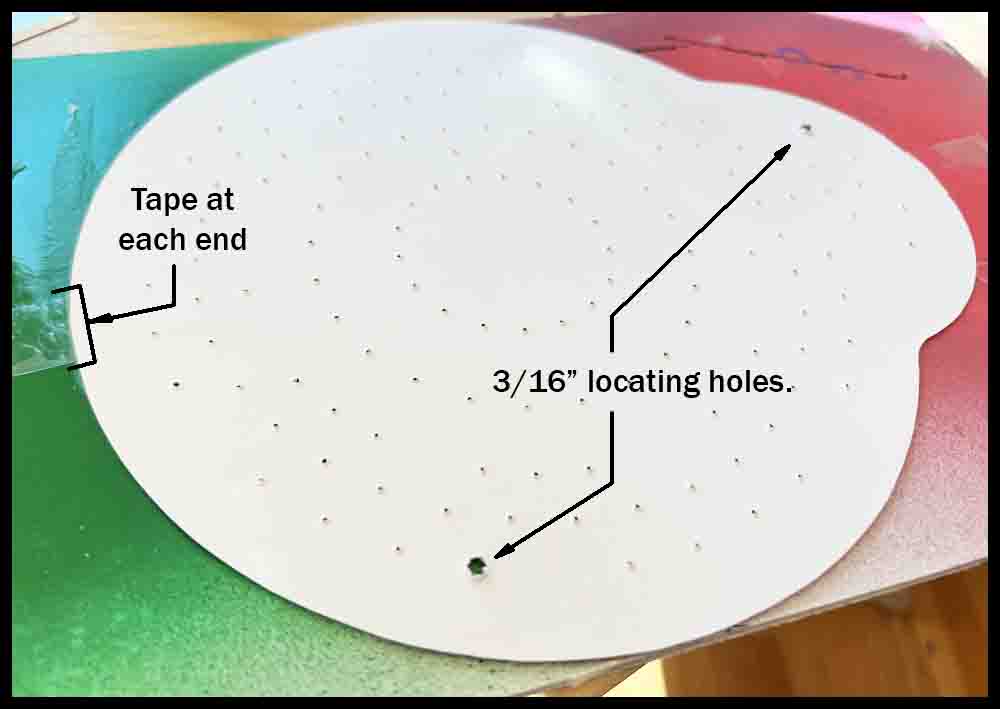
Pick two holes at opposite ends of the image to be location holes and open them up with a 1/8″ piercing tool, followed up with the bottom of a 5/32″ drill bit used as a piercing tool. Be careful to keep the holes centered as close as possible on the image while enlarging them. These location holes will be used in Step 14. Lay the image upside down on a scrap piece of poster board or smooth cardboard. To keep the image from moving when applying the glue, tape each end to the scrap just enough to keep it steady, maybe covering the image 1/16″ or so.
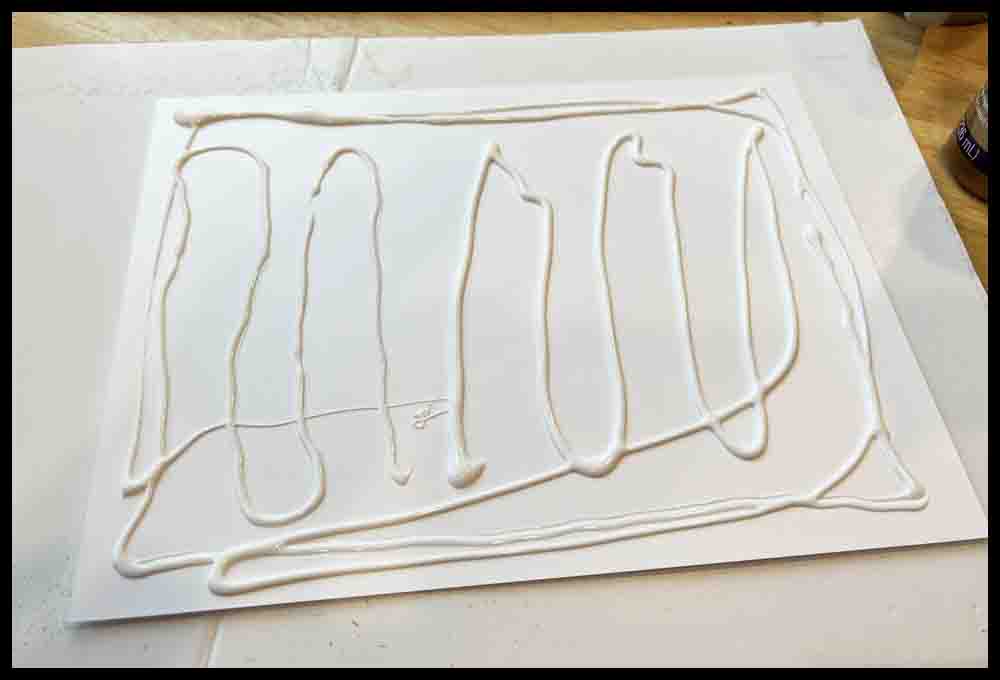
13. Use a good craft glue that dries clear and is water soluble. Squirt a generous amount all over the image, then smear it all around with a scrap piece of poster board or a flat foam brush. Spread the glue all the way to the edges, overlapping a bit onto the scrap it is taped to if necessary. Take care that the image doesn’t move and get glue on the wrong side.
14. CAREFULLY remove the image, flip it over, and center it on the wooden board as close as possible to the pencil marks made earlier. A pair of tweezers may help. Gently insert two 5/32″ drills upside down (or other 5/32″ location pins) into the two location holes pierced earlier. Some photo paper may be pushed into the hole as you do this. Keep the image lined up with the pencil marks.
15. Smooth the board with your fingers or a paper towel, starting from the center and working over to the edges. Wipe any excess glue away with a damp paper towel. If any glue gets on the image, gently dab it away. After the image has set up a bit and appears flat, remove the two locating pins, being careful to not raise or move the image when doing this. Recheck the whole image to make sure it is flat without any buildup of glue.
Note: I use an Epson printer with good quality photo paper. I can carefully wipe small bits of the image with a paper towel dampened with a small amount of water and not remove or smear the ink. However, too much rubbing or moisture will definitely mess up the image. If you are unsure how the ink being used will react, experiment with a small drop of glue first on another photo. As with any project, there is always a time when things don’t go as planned. 🙁
16. Make sure the glue has dried, preferably overnight, before proceeding. Consider putting a pile of books or something similar on top of the image to keep it flat.
ZZZZZZZZZZZZZZZZZZZZ………. 🙂
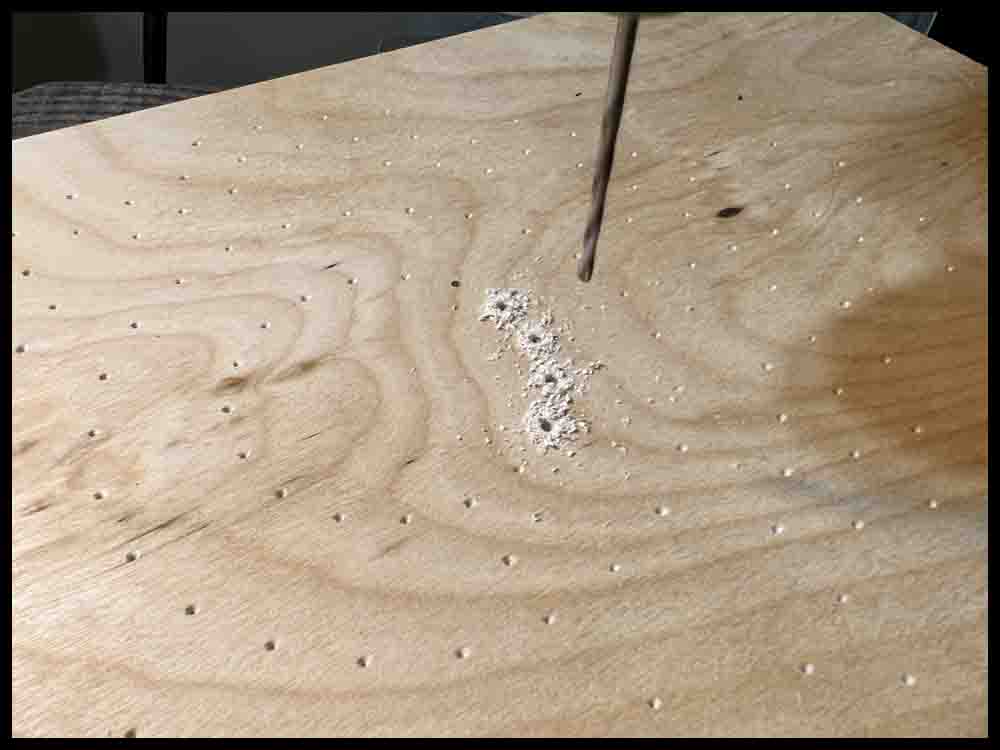
17. Use the 1/8″ piercing tool to open up all the tiny holes pierced earlier. Using a slight twisting motion and go through the board an inch or two. Before withdrawing the tool, wipe off any excess glue that the tool may have picked up.
18. Use the 5/32″ reamer to cut through the paper. Center it over the 1/8″ pierced holes and slowly enter the board. The reamer will pick up the existing 5/32″ hole. Using a drill press will make this process much easier. Reamers are usually run at slow speeds, but a faster spindle rpm used here will do a better job of cutting the photo paper. There is a video showing a hole being reamed in Make a Game: Rainbow Raceway.
Note: If you cannot find a 5/32″ reamer anywhere (I bought mine online; they are not a common size for reamers) then a 3/16″ reamer could be used. Instead of drilling all the holes initially with a 5/32″ drill bit, use a 3/16″ drill bit. For locating pins in Steps 12 and 14 use 3/16″ size in place of 5/32″. You could still use a 6-32 game piece (it will be sloppy) or switch to a 8-32 game piece (.156 diameter). Any washers used when making the game pieces cannot be larger than 3/8″ diameter for this game.

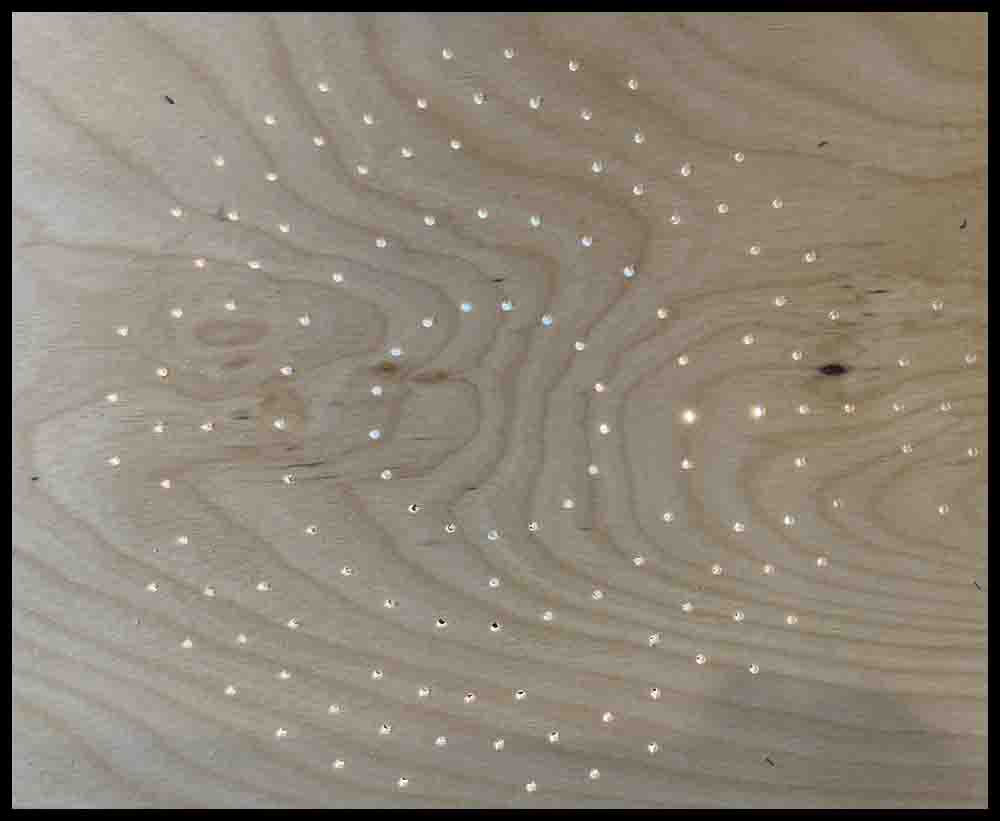
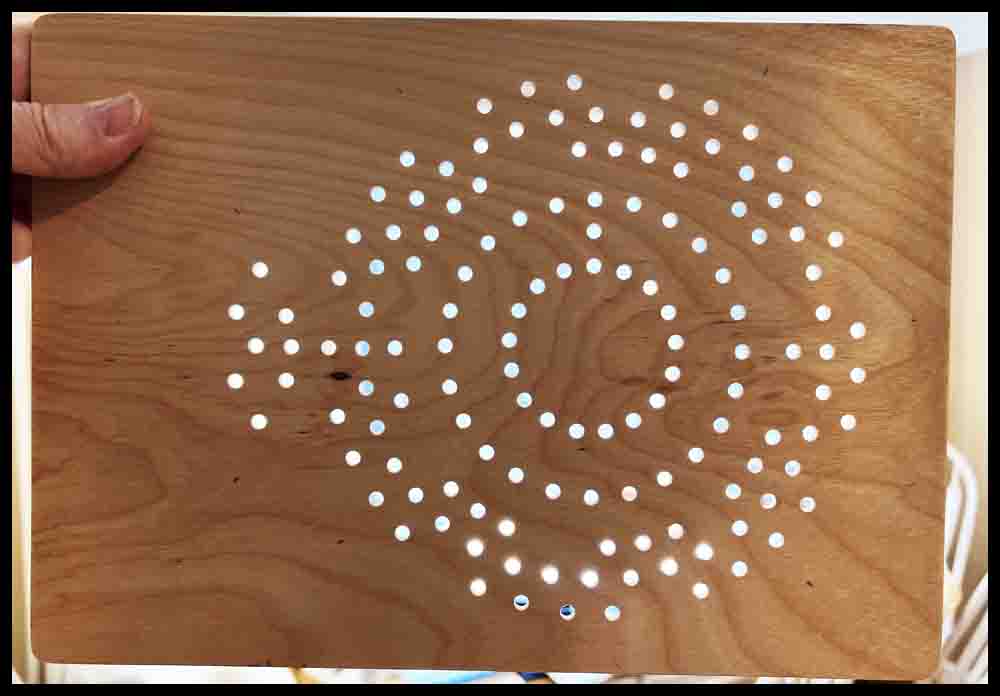
19. Hopefully all the holes will look fairly uniform. There will be a small ridge on the top of the hole. Using a center punch approximately 3/8″ diameter or bigger, tap the center punch firmly with a hammer in each hole (just make sure the center punch is at least 1/4″ diameter to keep from adding a dimple to the top of the holes). This will reduce the size of the ridge and make the holes look nicer. Use various tools to make sure the hole interiors are clean without any paper or glue still in them.

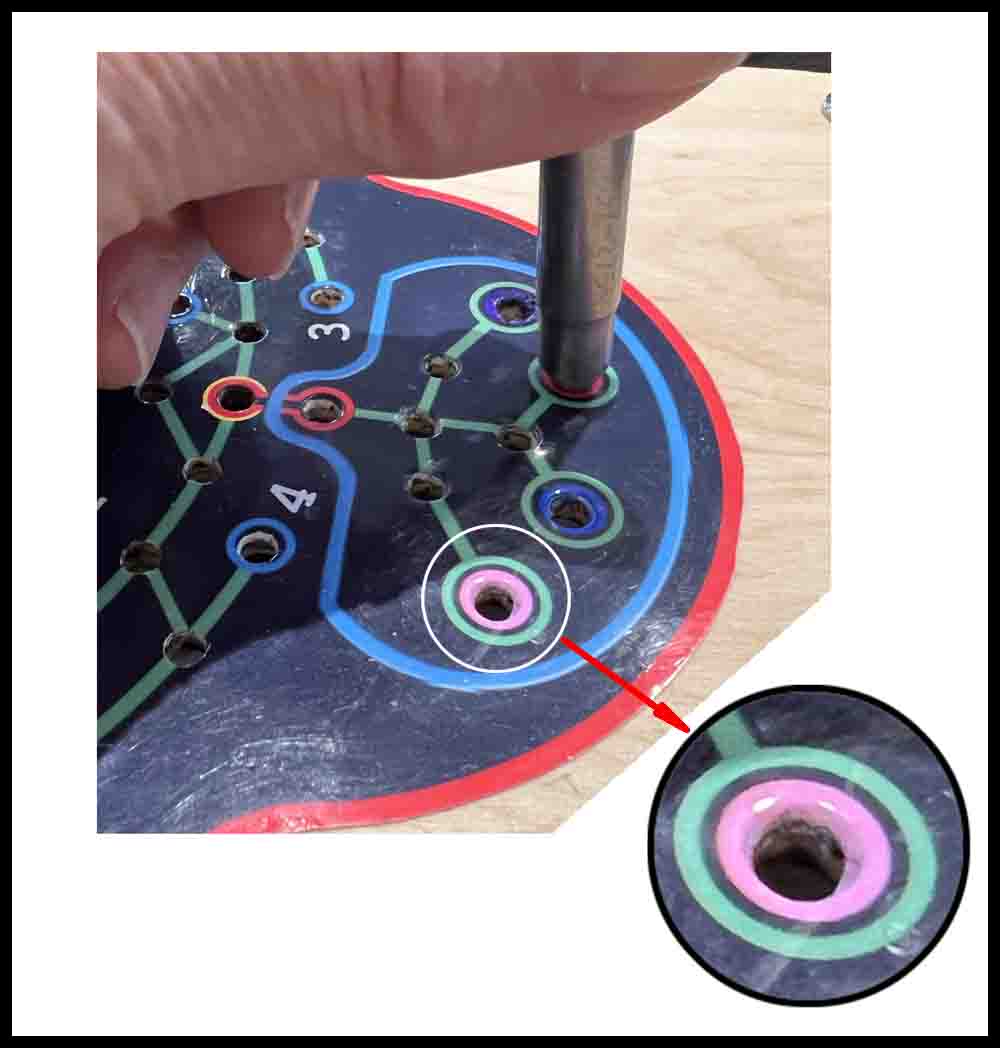
To clean up some of the torn image paper and extra glue in the holes, I purchased a cheap soldering iron to carefully burn away junk and make neat holes.

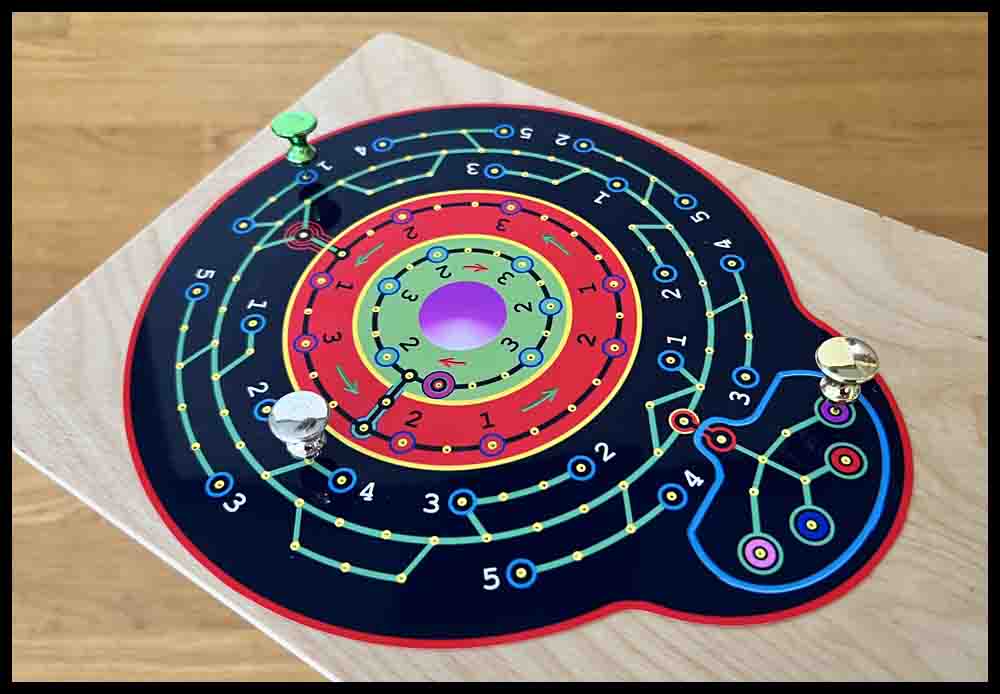
Add some finishing touches if desired. Instead of just adding felt pads, I drilled four holes and mounted 5/16 flat head screws and nuts for an industrial look. I then added felt pads to the bottom of the screws.


Game Pieces (Space scooters)
The type of game pieces you can make depends on your equipment and skill set. Anyone with a 3D Printer can make some cool ones, and if you have a lathe available you will be able to create some beautiful Space Scooters. Limit the overall diameter to 3/8″ so two pieces can sit side-by-side in the Green ring. The bottom diameter (the part that fits in the holes in the game board) should be approximately .135″. The easiest way to make some Space Scooters (game pieces) is to use 6-32 machine screws.
Click the purple button to make Space Scooters.
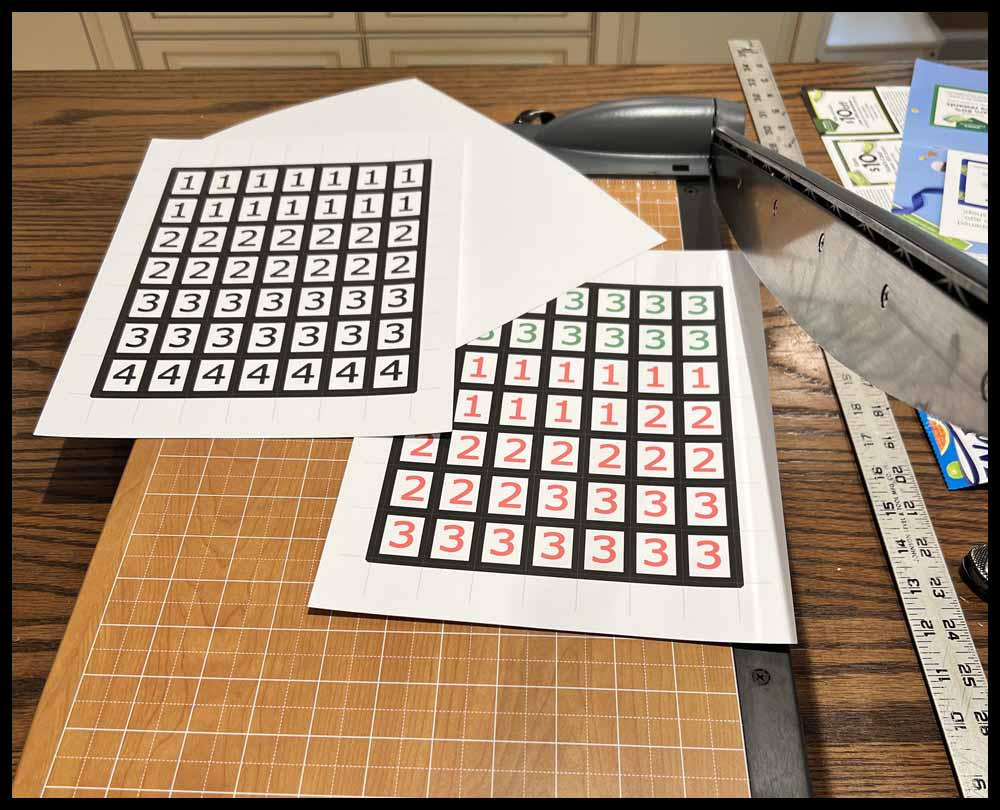
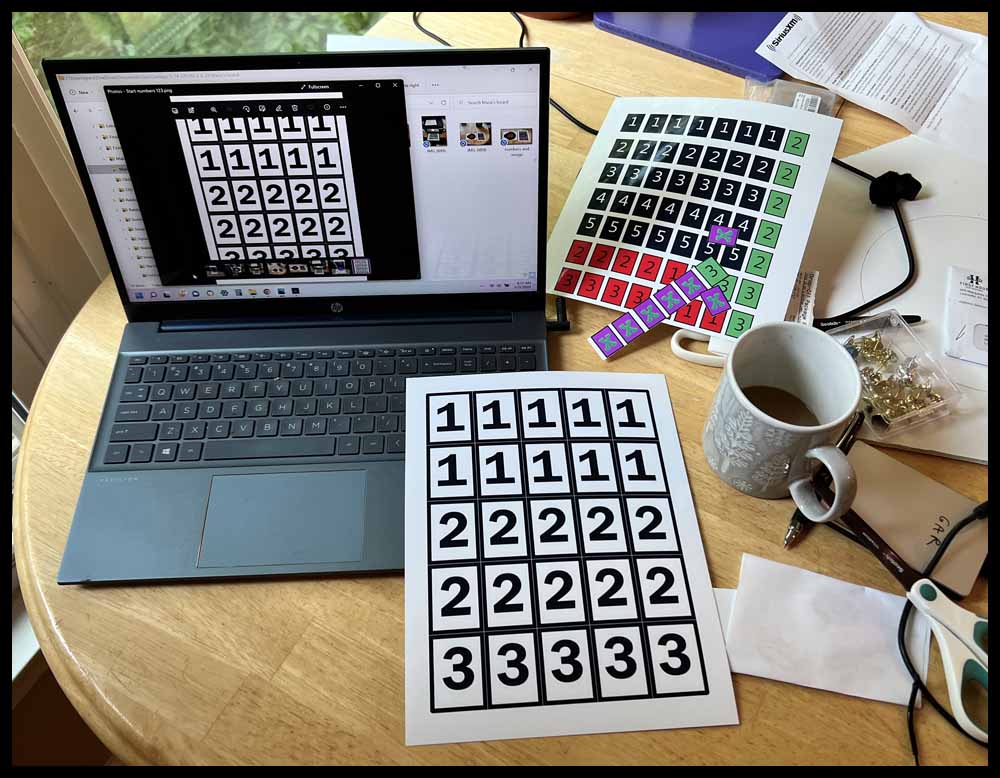
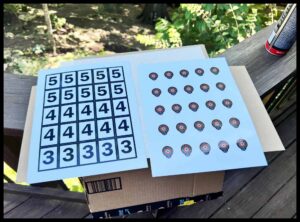
Number Cards
You will need to make some Number Cards for the game. There are two sizes to choose from. The first four images are bigger numbers that measure about 1 1/2″ x 2″. Click on the image, copy it to a hard drive, then print. Cut them out with scissors. I suggest using photo paper or heavy card stock.
There are several ways to use the images:
1. Cut them out with scissors, then use them as is, leaving the other side blank. Card stock makes a nice number card.
2. Decorate the backs with markers.
3. Print out the last image on the right and glue it to the back of one of the four number images. Photo paper will work well and make some really nice number cards with this method.


This next set of numbers are a little smaller and measure about 1″ x 1 1/4″. Like the bigger ones above, print the first three images onto heavy card stock and use them as is. For a more professional looking number card, print out three copies of the fourth image on glossy photo paper and glue it to the first three.
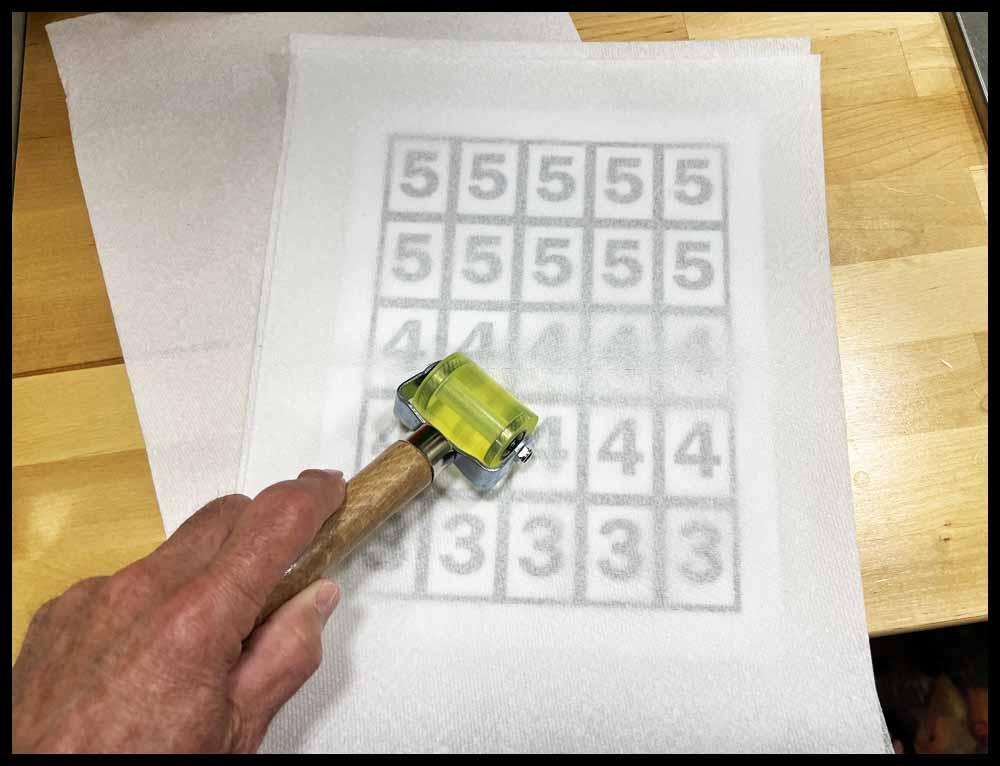
Here’s how to glue the front and back images together:


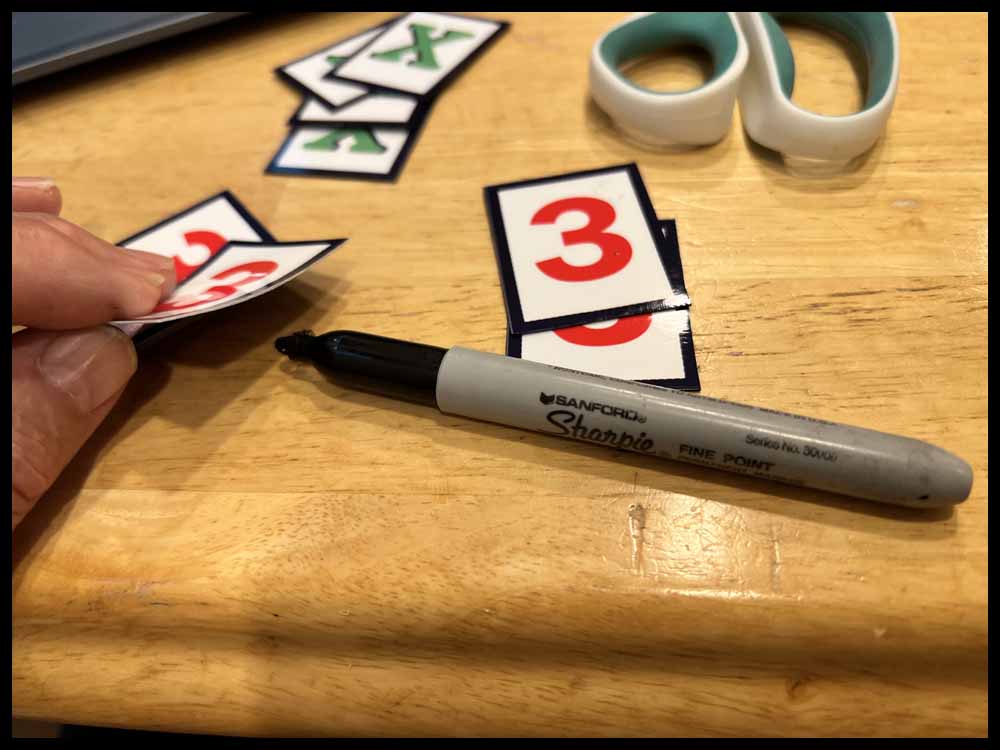
Since I will be making more numbers for Orbital Summation and red cards for Rainbow Raceway, I decided to make a small locating fixture and use spray adhesive to join the two sheets together. The sheet slides in with just a slight bit of clearance on the two long sides. This process, with a little practice, is faster and easier than the method above. But be forewarned: You can make slight errors when joining the sheets together in the process above. But with the spray adhesive it is hard to separate the sheets once they contact each other.
Eight- Sided Dice
Make or buy some eight-sided dice that have the numbers 1-4 on them twice. If you can only find dice with the numbers 1-8 on them, just treat the numbers 5-8 as 1-4. Not ideal, but it will work in a pinch. Another option is to use virtual dice. To use these dice, click the link below on the right. One six-sided dice will appear. Click on it and it will disappear. Next click the Green 4 twice and then start rolling!


Take me to Space